Create a Table with Columns and Buttons
-
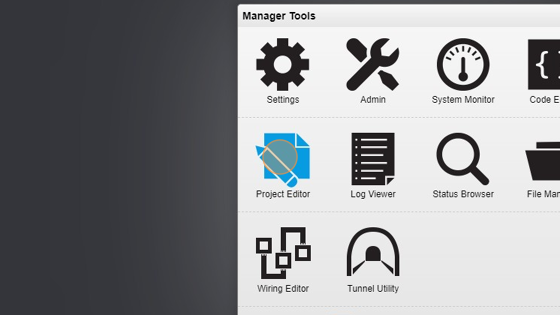
Navigate to HSYCO Manager
-
Click on "Project Editor"
- Click on "New Project"
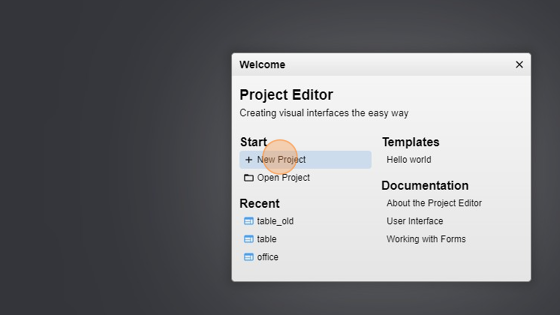
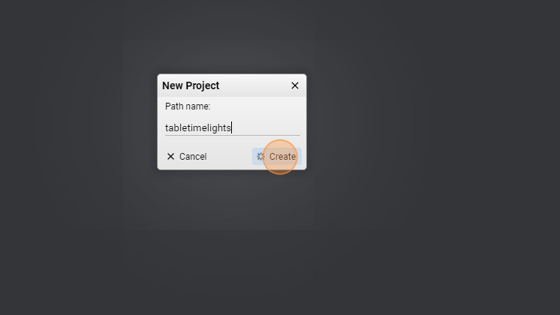
- Name it (tabletimelights for example)
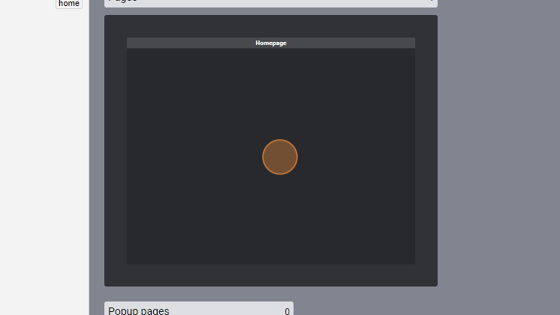
- Click here to access the home page
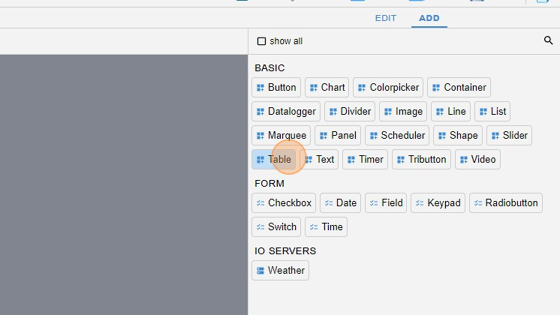
- Click on "add"
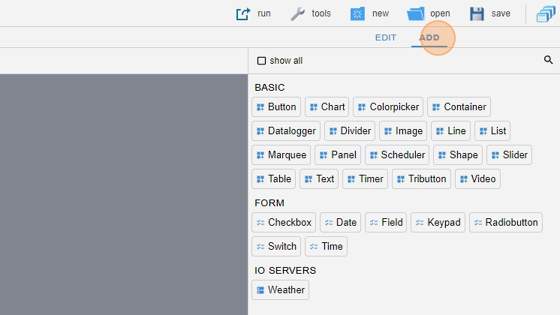
- Click on "Table" to add a table to the current page of the project
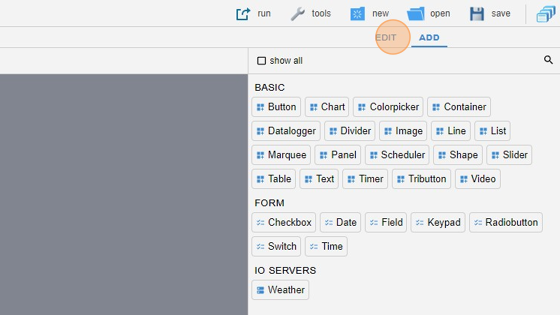
- Go back to "edit" mode
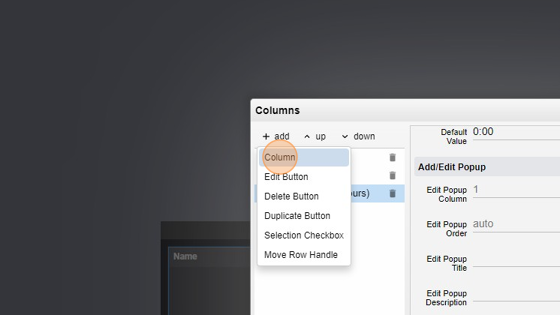
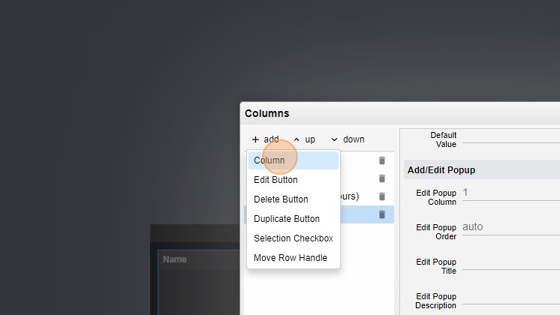
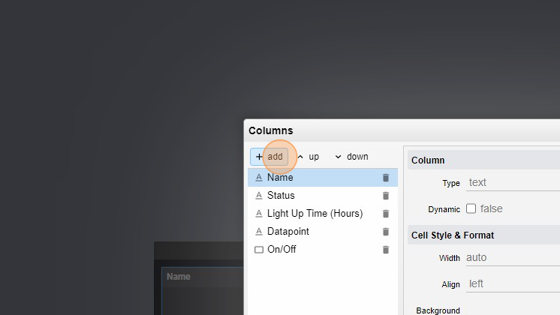
- Click on "not set..." under the "Columns" tab to add some columns to the table
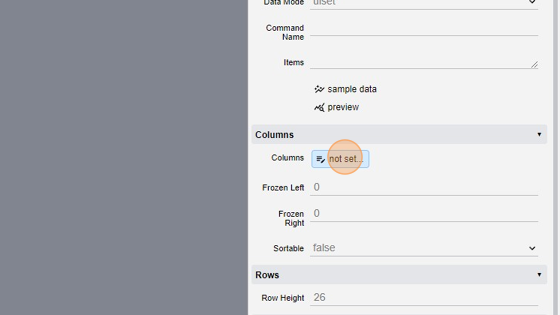
-
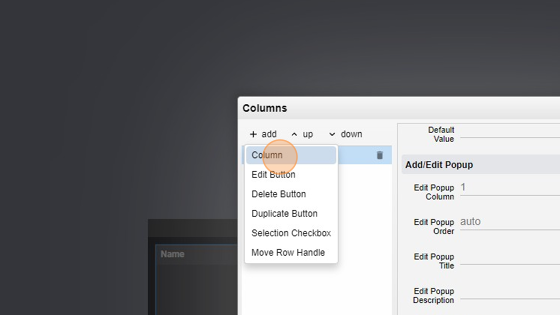
Here we can add a column, an edit button, a delete button and other useful objects
-
We will create a 5-column table containing: a Name that can easily distinguish a light, a Status (On/Off), a Light Up Time representing the number of Hours a light has been On, a hidden datapoint field that stores the datapoint of the light and a button to turn On and Off that light
-
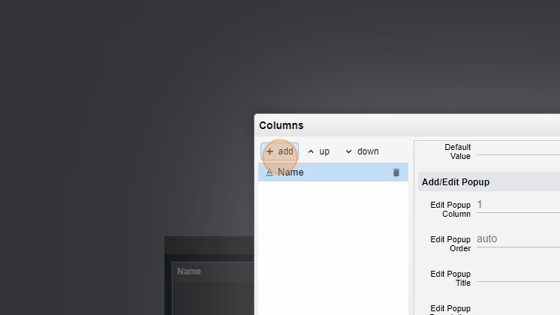
Click "add"
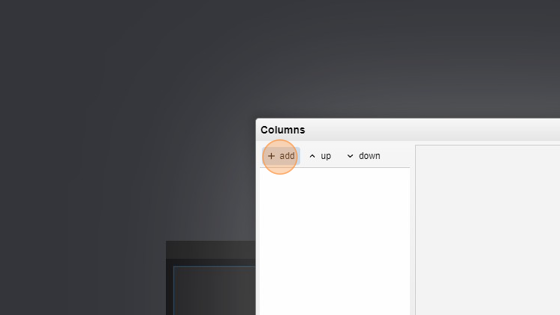
- We'll start by adding a "Column"

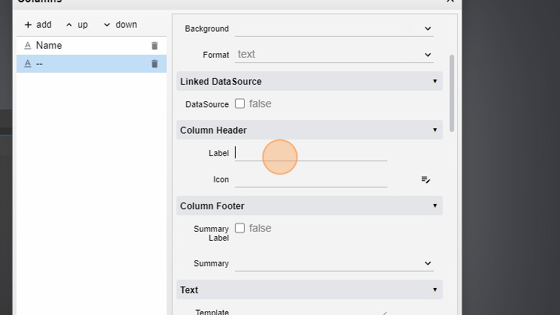
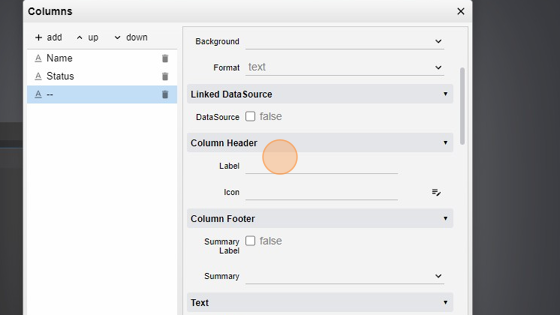
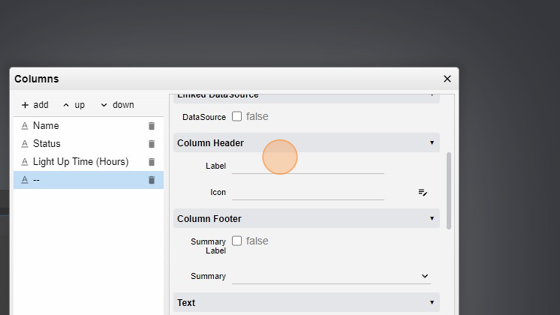
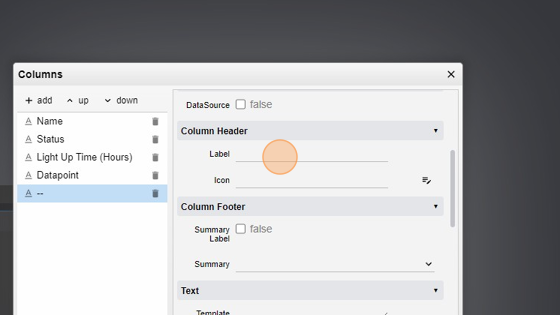
- Click on the "Label" input field under the "Column Header" to give it a name. This will be the Header of the Column
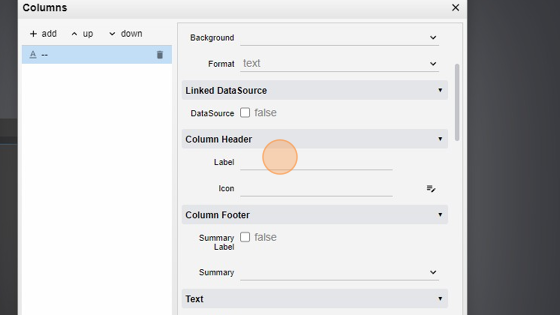
-
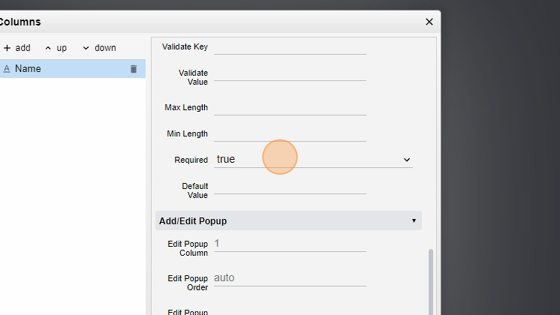
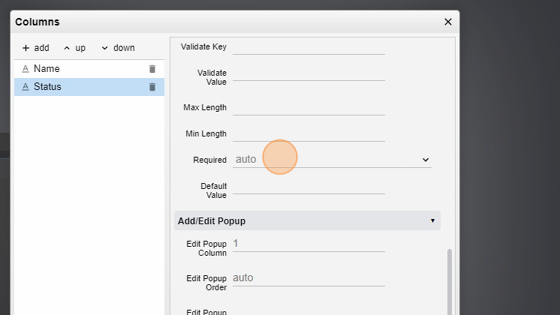
Type "Name"
-
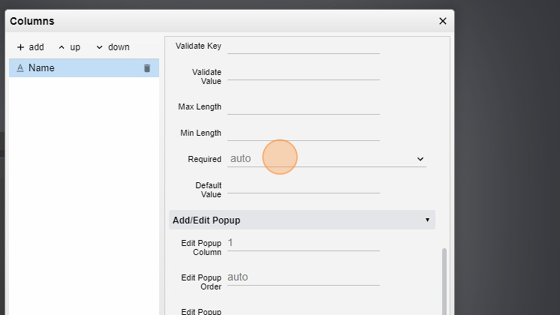
Now we'll make this text required by changing the "Required" field from "auto" to "true". In this way the user has to obligatory input this value
- Click on "add"
- Select "Column"
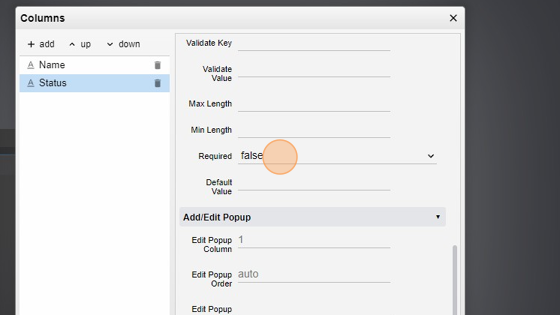
- Change the "Label" by tiping "Status"
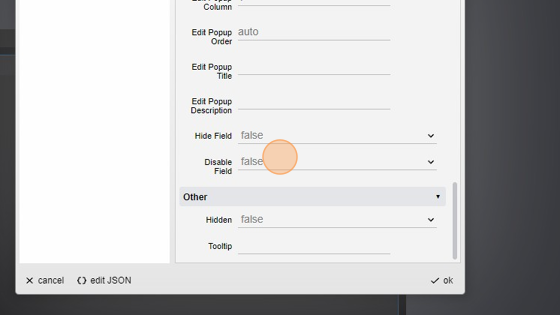
- Make this field not required by changing the "Required" field to "false" as we will set a default value later on
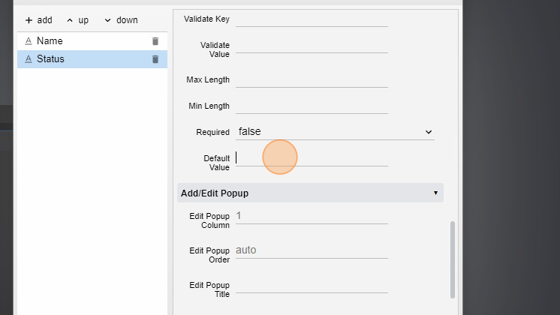
- Click on "Default value" and type "Off". This will automatically set this value to "Off" every time we insert a new row in our table
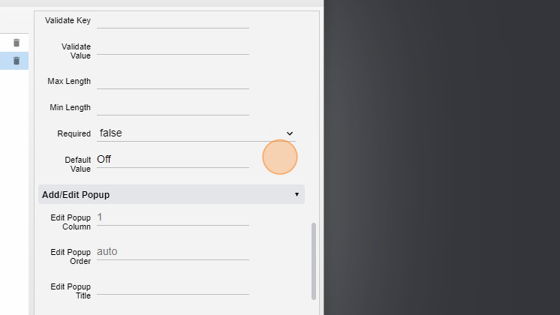
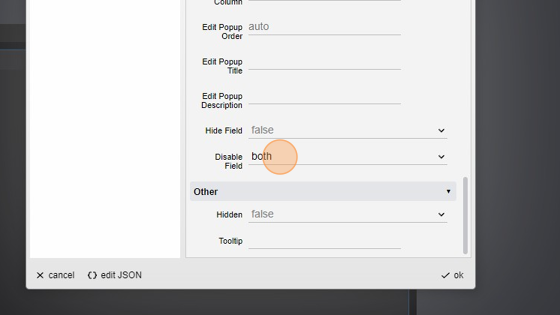
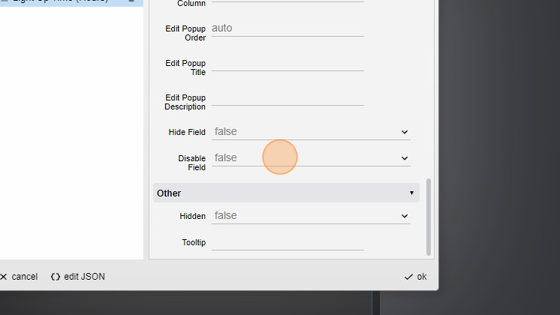
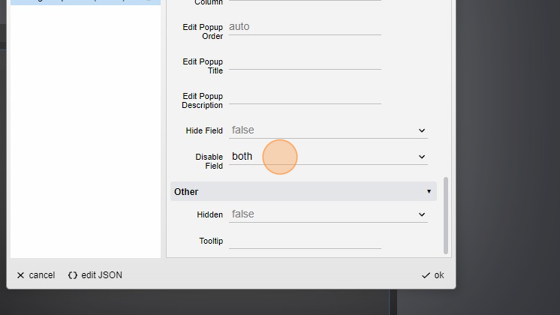
- Now we'll set the "Disable Field" to "both" as we don't want the user to be able to modify this value neither in view nor edit mode.
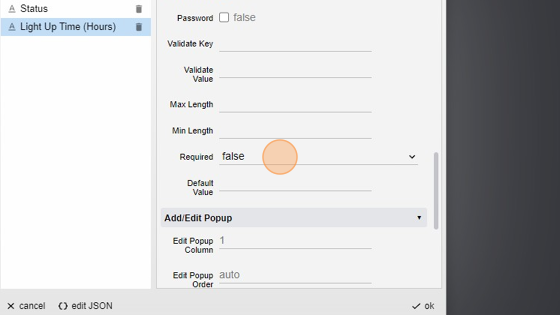
- Click on "add" and then "Column"

- Change the "Label" to "Light Up Time (Hours)"
- As we did before, make this value not required by changing the "Required" field to "false"
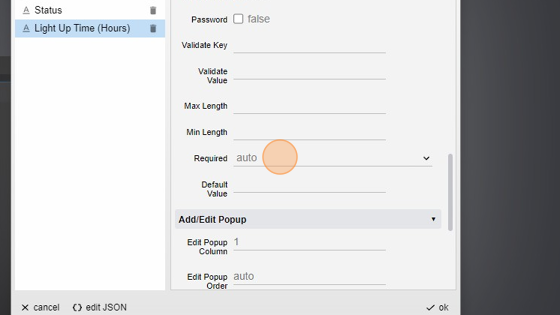
- Now set the "Default Value" to "0:00"
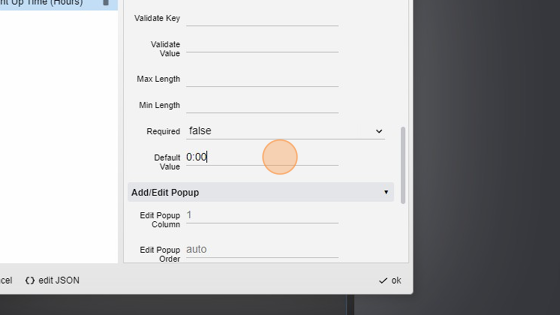
- Again, disable this field in "both" view and edit modes
-
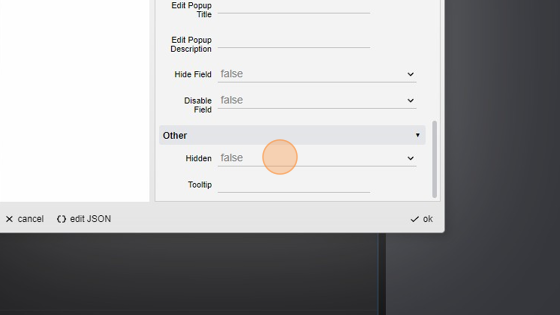
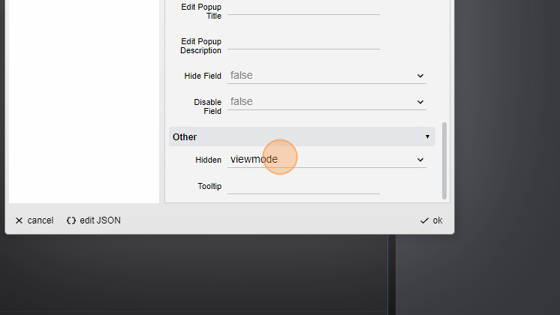
Now we'll create a column that will be invisible in viewmode but will contain the link to the datapoint of the light so that we can use it to turn it on and off later
-
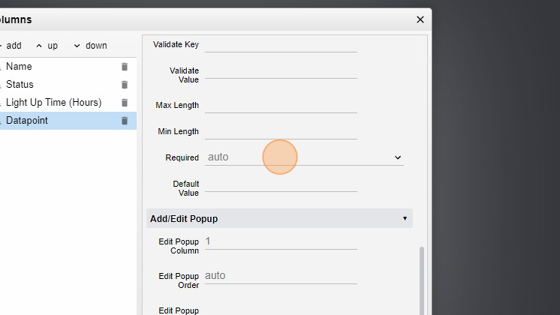
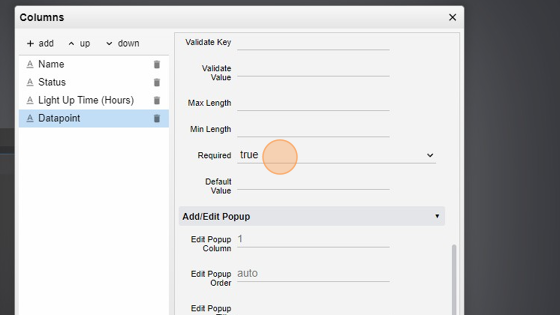
Click on "add" and add a "Column"
- Change the "Label" to "Datapoint"
- Make this filed required setting it to "true"
- Now go deep in the setting to find the "Hidden" field and set this to "viewmode". By doing so, the column will be invisible in viewmode but visible in editmode
- Click "add" and add a "Column"
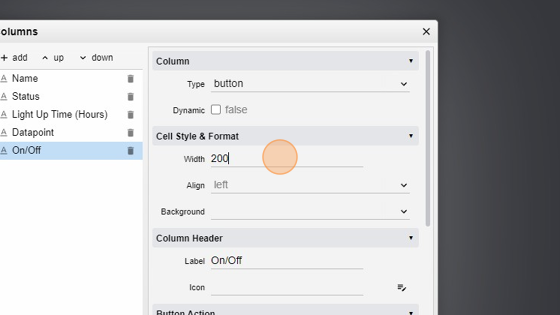
- Change the "Label" to "On/Off"
- Now change the "Type" of the column from "text" to "button"

- Click the "Width" field and type 200 to give the button a bigger appareance
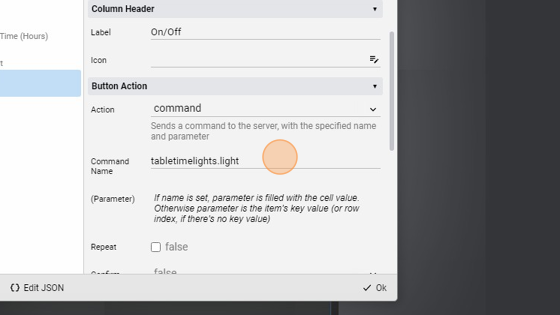
- Now we'll set the command that the button will send when pressed. Change the "Action" to command

- Type a "Command name" like "tabletimelights.light"
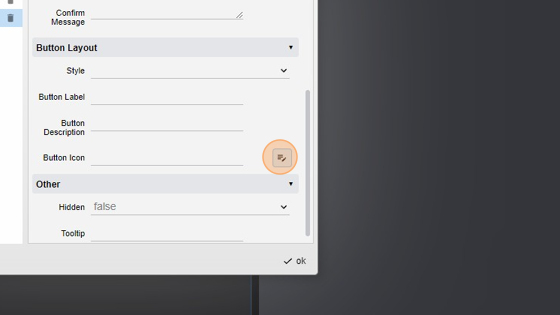
- Now we'll set the icon that will be on the button to give it a better appareance. Click on the little button on the left of the "Button Icon" field
- Click the "Filter" field and type light
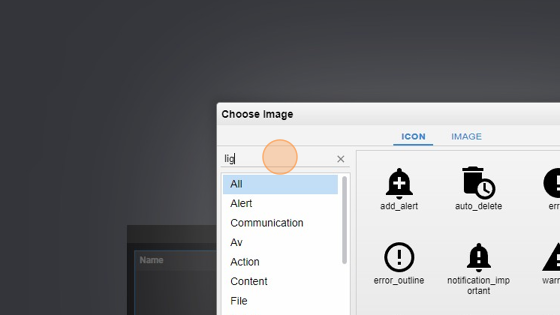
- Select an image
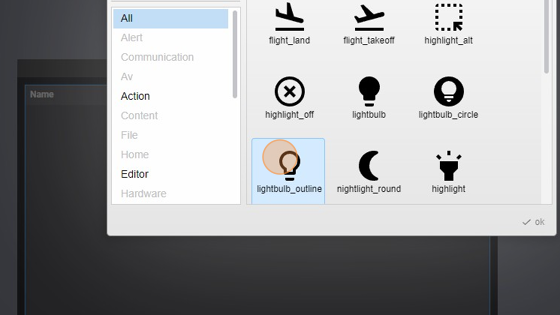
- Click "ok"

- Click "add"
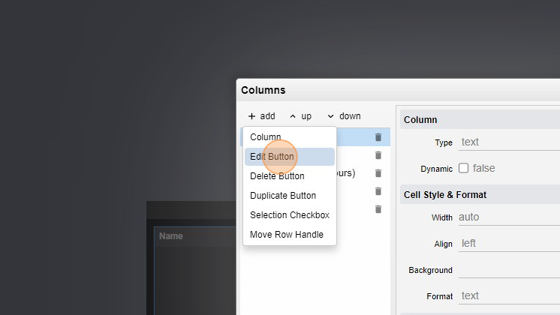
- Click on "add" and add an "Edit Button"
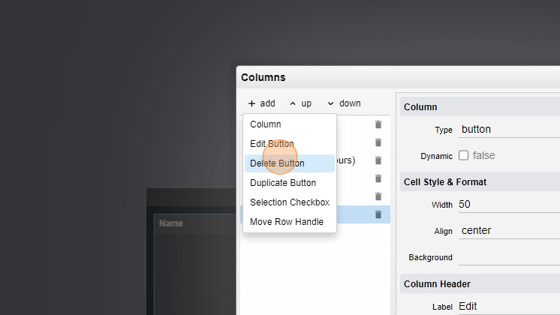
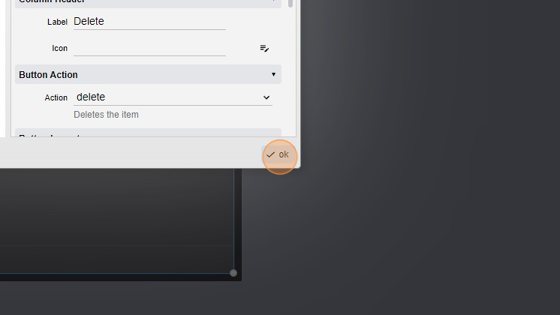
- Do the same with the "Delete Button"
- Click "ok" to save the actual configuration
-
Now we'll set some options to our table
-
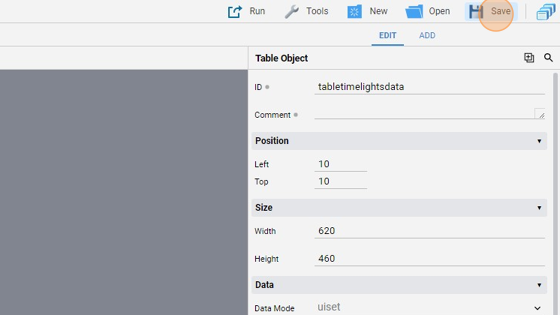
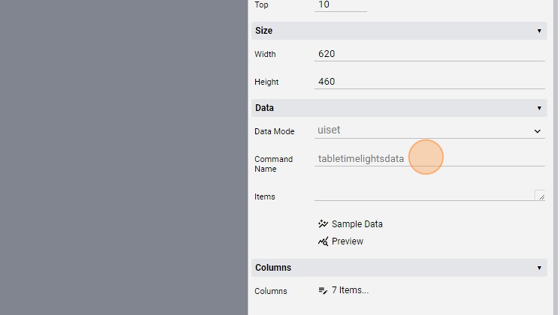
Change the ID to "tabletimelightsdata"
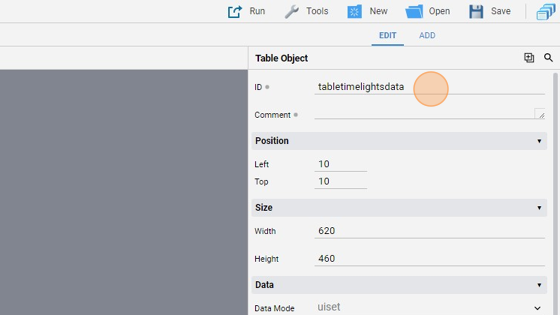
- As you can see, the "Command Name" field, if empty, is the same as the ID. This is the command that the table will launch when we add a row
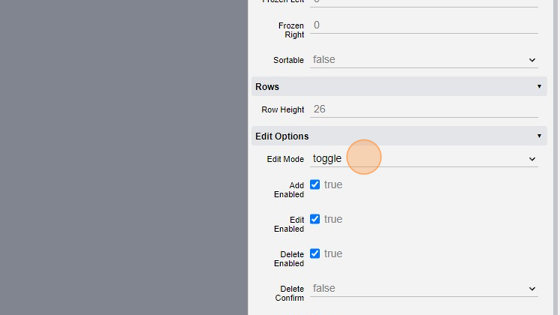
- Click the "Edit Mode" field and change that to "toggle". By doing this the add button and the confirm button show up on the right hand-side of the table
- Click "Save"