Projects
A project defines a custom user interface, that allows the user to interact with HSYCO. Each project has one or more pages that contain UI Objects. On HSYCO, you can build as many projects as you wish, with no limitations on the number.
HSYCO allows the interaction with the system through a custom user interface. We can identify three entities:
- Project: a single interface
- Pages: a project contains pages
- Object: a page contains objects
A project is defined by a subdirectory inside www/projects/<project name> that contains an index.xml file.
Whenever HSYCO detects any change to the files in www and in its subdirectories, it forces the reload of the modified projects on the connected browsers.
To open a project in the browser, you need to enter the following URL:
https://<HSYCO ip address>/<URLKey>/<project name>
To create or edit a project there are two methods: visually, through the Project Editor or by manually editing the project's source code, the index.xml file in the www/project/<project name> folder.
Project Editor
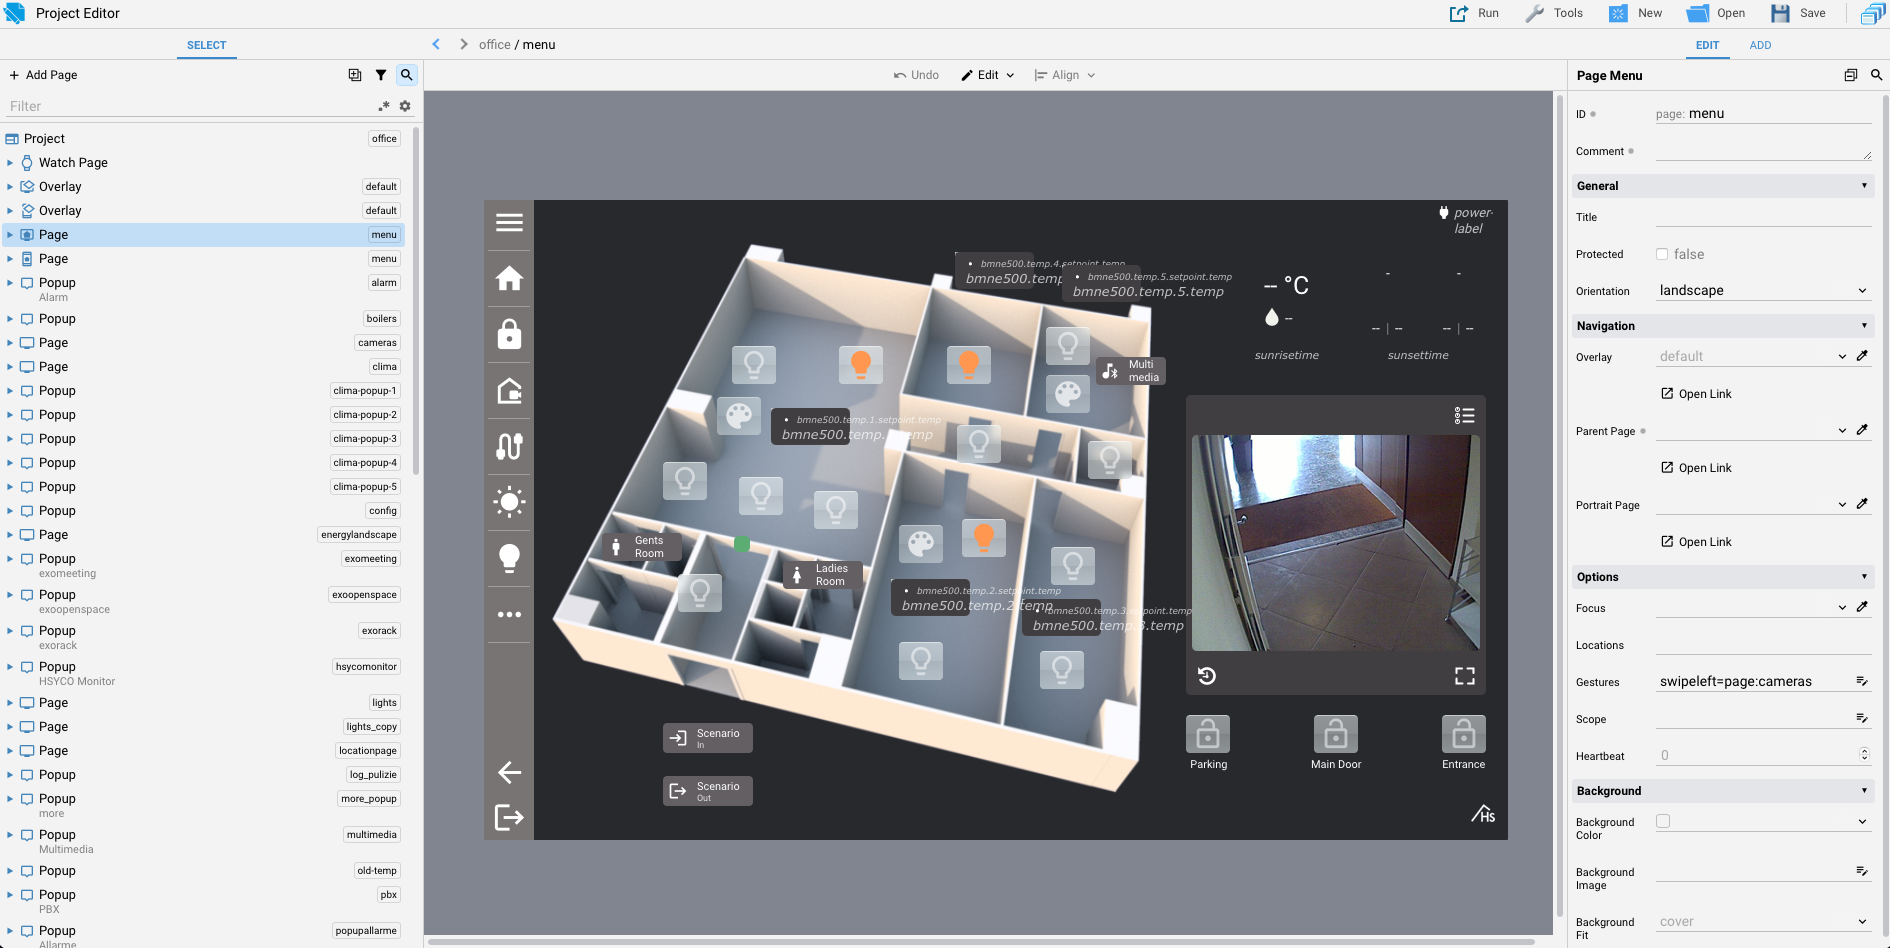
The Project Editor is a very powerful Web-based visual editor you can use to create user interfaces.
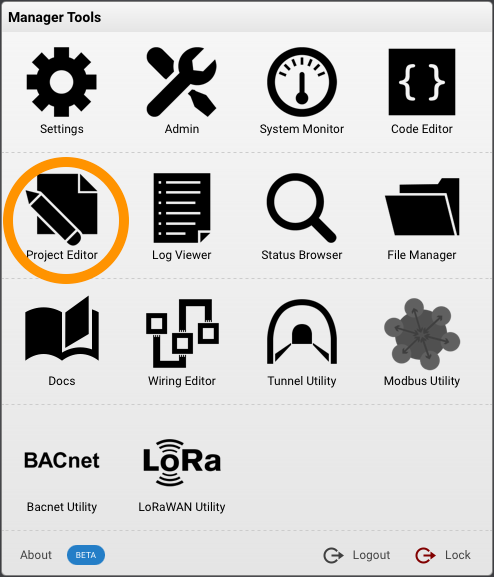
From the Manager splash screen click on Project Editor.
From the welcome screen it is possible to create a new project or open an existing one.
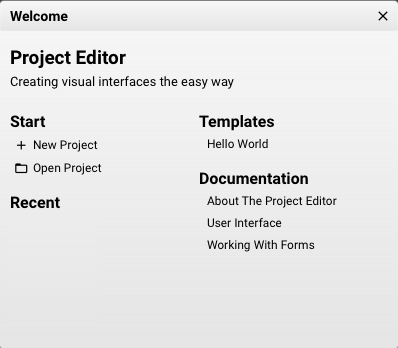
Click on New Project to open a new popup window:

Type a name for the new project.
"manager" is a reserved name
Projects cannot have uppercase characters in their names; only letters and numbers are allowed.
Click on the button "Create" to create the new project.
If you want to make practise with the Project Editor tool, we recommend following this tutorial:
Alternatively, you can continue reading this section, where we will provide a detailed description of the Project Editor.
The Project Editor is divided into three main sections. In the central part, you can see the project page that you are currently editing. In the left column (1), there is a tree list of all the project pages and the objects contained within the pages. In the right column(2), you will find the attributes of the selected page or object or a group of selected objects.
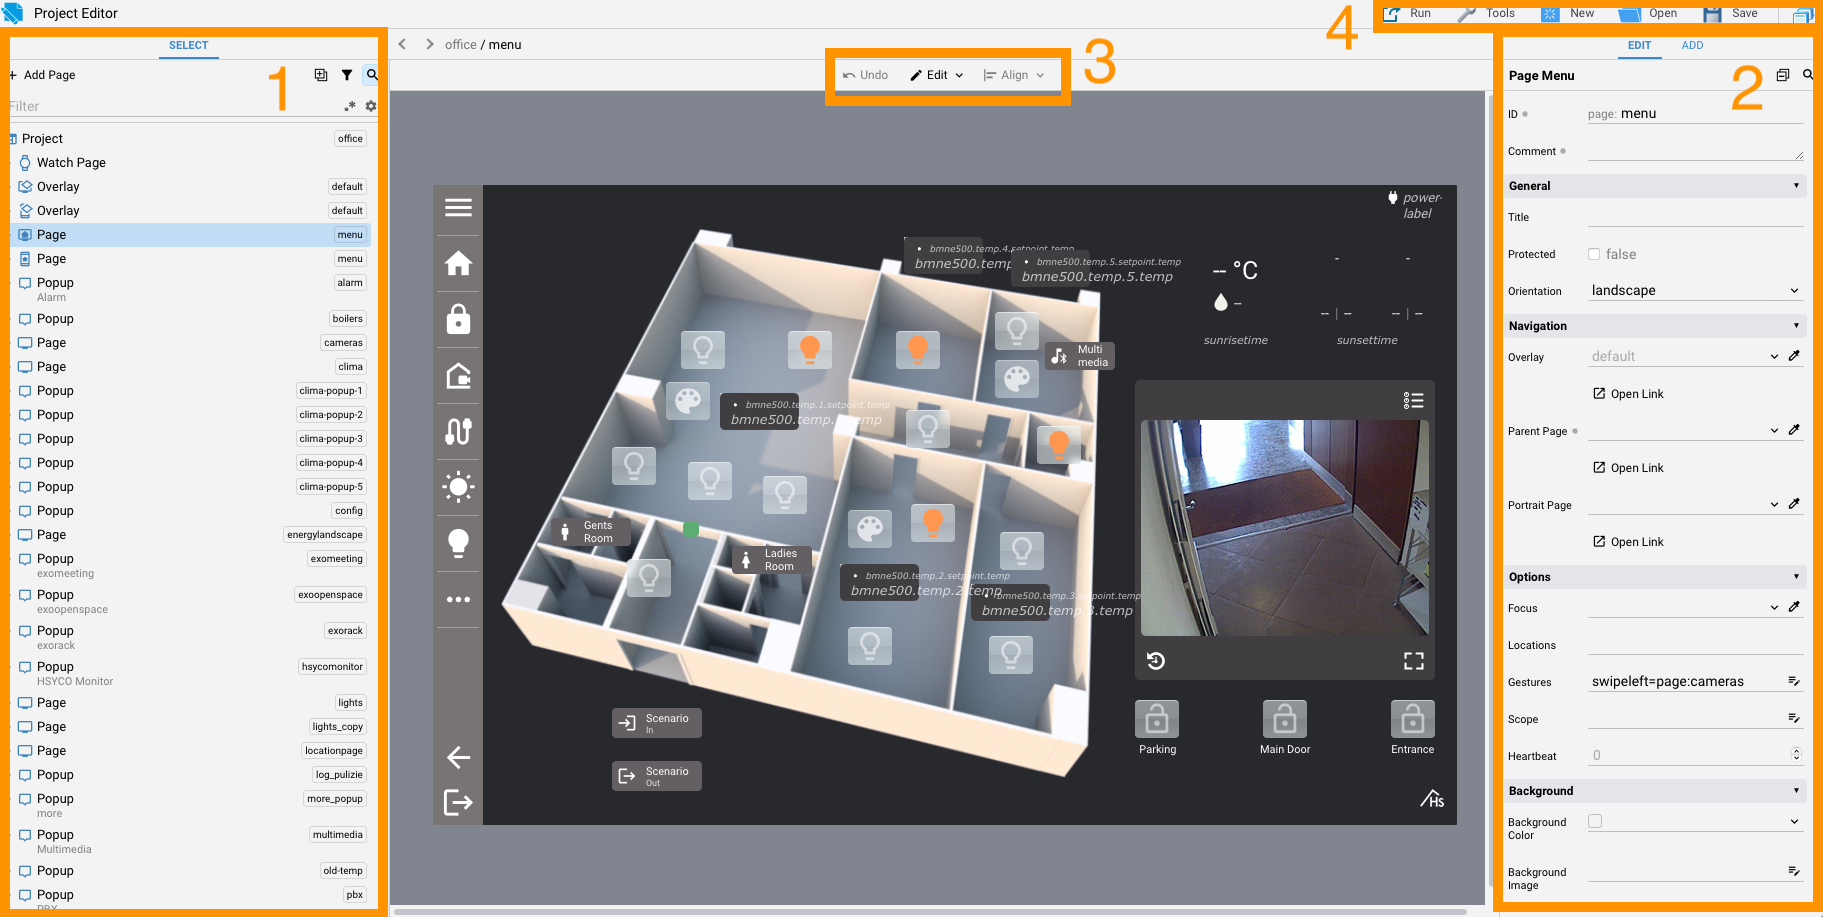
In the top center, there is a menu for alignment and undo operations (3), and in the top right, there is a quick menu for saving the project and other functions (4).
The Select tree
To the left in the Project Editor interface, there is a column containing the tree structure of our project's elements. This column lists all the pages, and for each page, it displays all the objects. The width of the column can be adjusted. Selected items can be dragged and dropped to other pages.
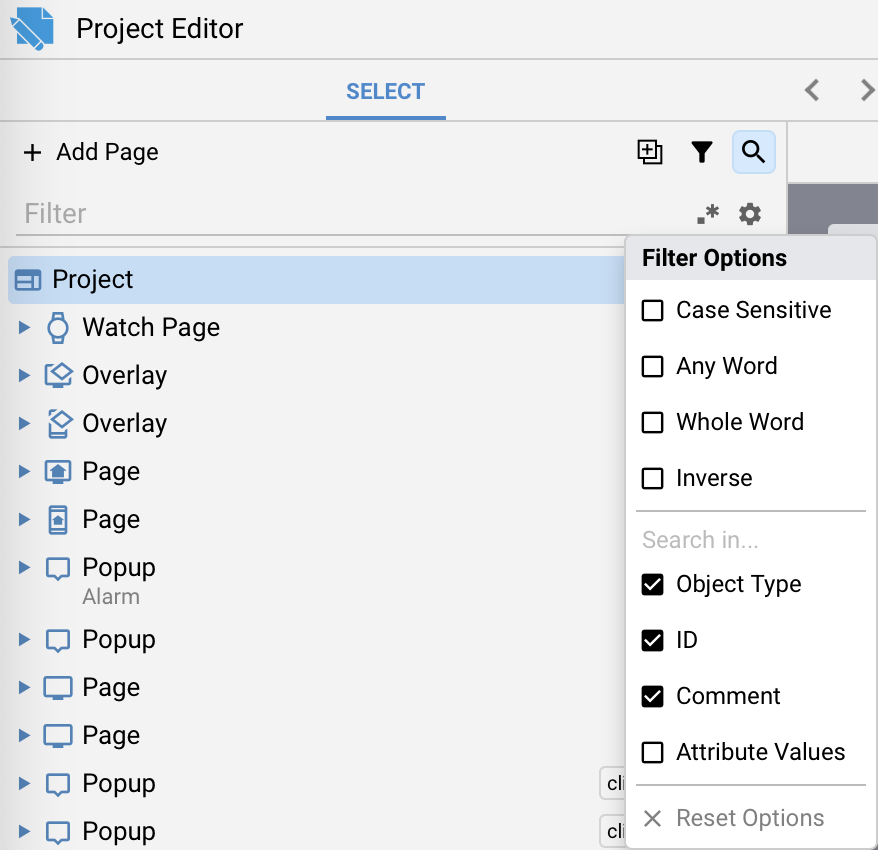
Select tree filter options
In the filter section, you can perform a search with various filter options.
-
Case Sensitive: This option indicates whether the search is sensitive to the capitalization of letters. When enabled, it will only return results that exactly match the letter case you've specified. For example, a search for "apple" with case sensitivity enabled will not match "Apple" or "aPpLe."
-
Any Word: Selecting this option in a search box means that the search will return results containing any of the words you've entered. It's useful for finding documents or content that contain at least one of the specified words, regardless of their order or combination.
-
Whole Word: When this option is chosen, the search will exclusively return results where the entire word you've entered matches completely. It won't retrieve partial matches or words that contain the search term as a part of a longer word. For instance, a search for "cat" with this option will not match "category."
-
Inverse: Inverse search, also known as "NOT" or "Exclude," is an option that excludes specific terms or words from your search results. When you use this option, the search will return results that do not contain the word or phrase you've specified. It's valuable for narrowing down your search by eliminating unwanted content.
You can search in the Object Type, item IDs, Comments, or attribute values.
You can also use a regular expression.
At any time, you can reset the filter options.
Project attributes
Selecting the first element of the tree opens on the right the project attributes list. The description of each available attribute can be read in the Project Attributes section.
Adding a new page
Pressing the button "Add Page" opens a popup window:
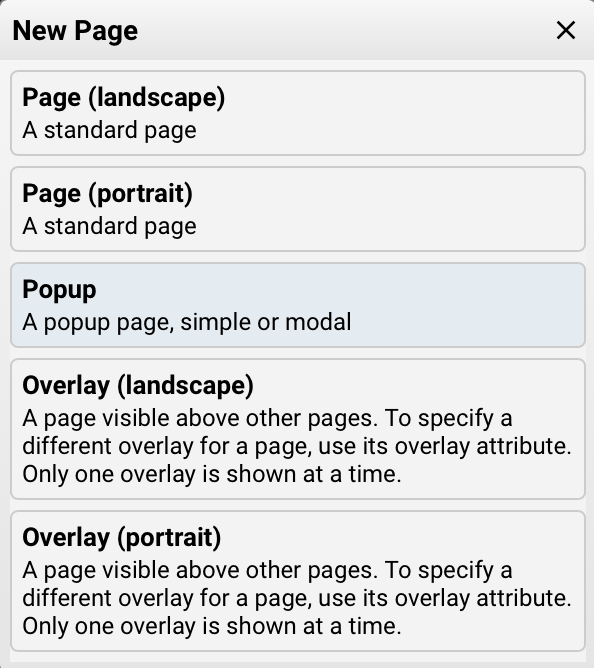
There are five different types of pages in HSYCO: regular pages with landscape or portrait orientation, overlay pages with landscape or portrait orientation, and popup pages.
Landscape mode refers to interfaces with horizontal orientation designed for PCs and tablets, while portrait mode refers to interfaces with vertical orientation designed for smartphones. Popus are not affected by orientation, they can be used in both landscape and portrait mode.
If the project supports the orientation mode, pages (all but popups) can have two versions with the same id and an orientation that can be portrait or landscape. When opening a page with a specific id, the page with the corresponding id and current orientation will be chosen. If it's missing, the page with same id but different or missing orientation value will be chosen instead.
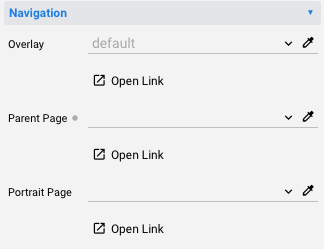
It is possible to specify the corresponding page orientation as either landscape or portrait for each page. Additionally, you can define an overlay and a parent page. For an example related to this, please refer to the tutorial on the breadcrumb object.
Page and popup attributes
Choosing a page in the Select tree reveals the list of page attributes in the right-hand column. The description of each available attribute can be read in the Page Attributes section.
Choosing a popup in the Select tree reveals the list of popup attributes in the right-hand column. The description of each available attribute can be read in the Popup Attributes section.
The attributes column
The Edit tab
In the right column of the Project Editor, in the Edit tab, you'll find a list of attributes for the currently selected item in the Select tree.
Attribute column filter options
In the filter section, you can perform a search with various filter options.

-
Case Sensitive: This option indicates whether the search is sensitive to the capitalization of letters. When enabled, it will only return results that exactly match the letter case you've specified. For example, a search for "apple" with case sensitivity enabled will not match "Apple" or "aPpLe."
-
Any Word: Selecting this option in a search box means that the search will return results containing any of the words you've entered. It's useful for finding documents or content that contain at least one of the specified words, regardless of their order or combination.
-
Whole Word: When this option is chosen, the search will exclusively return results where the entire word you've entered matches completely. It won't retrieve partial matches or words that contain the search term as a part of a longer word. For instance, a search for "cat" with this option will not match "category."
-
Inverse: Inverse search, also known as "NOT" or "Exclude," is an option that excludes specific terms or words from your search results. When you use this option, the search will return results that do not contain the word or phrase you've specified. It's valuable for narrowing down your search by eliminating unwanted content.
You can search in the Name or Value of each attribute.
You can also use a regular expression.
At any time, you can reset the filter options.
Attribute sub menu
Clicking on the name of each individual attribute opens a submenu where you'll find the following options:
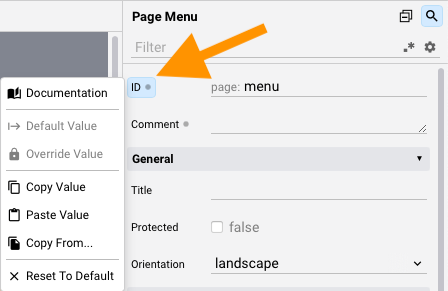
The Documentation button opens a popup with the documentation related to the selected attribute
It is also possible to Copy or Paste the attribute value of Copy From another attribute.
You can reset to the default value in any moment.
The Add tab
Selecting the "Add" tab grants access to the palette containing the objects available in the Project Editor.
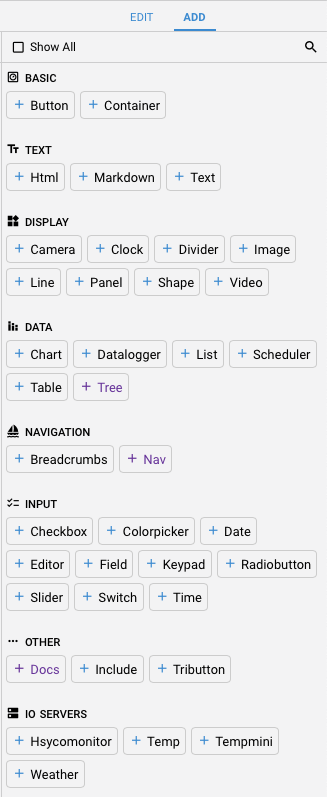
The description of each single object is available in the Objects section of this tutorial.
By selecting "Show All" in the upper section, all available objects will be displayed, including those from the I/O Server that have not been declared.
You can filter objects using the filter field; it also accepts regular expressions as input.
The Edit toolbar
The Edit toolbar consists of three buttons.
![]()
The Undo button when clicked reverses the most recent user action, effectively undoing changes made to the interface.
Edit menu
The Edit button opens a submenu.

This context menu allows you to perform various operations on the selected items.
Cut, copy, paste can be used across different pages and projects.
The Delete option removes the selected items.
The Duplicate option creates a copy of the selected items.
Hide and Lock allow hiding and locking in place one or more items, to facilitate the editing of the interface. This option is saved in the project file, but it doesn't affect the running project.
With Unhide All and Unlock all items in the active container (project, page or container object) are unhidden or unlocked.
Alignment menu
The Align button opens a sub menu with multiple actions that can be applied to a single object or a selection of objects.
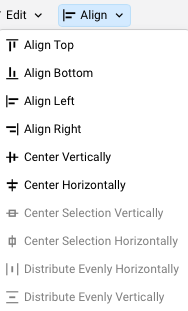
The menu is easy to understand; therefore, individual items are not explained.
The top right corner menu
At the top-right corner of the interface, there is a menu with various options.
![]()
The Run button opens a sub-menu which allows you to run the project in landscape or portrait mode or open the current page in a new browser tab.

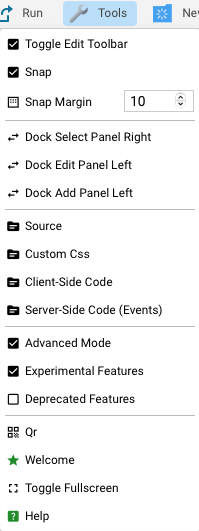
The Tools button opens a sub menu:
-
Toggle Edit Toolbar: show/hide the Edit Toolbar
-
Snap: enable/disable the automatic alignment snap between objects
-
Snap Margin: set the snap margin in pixel, default is 10px
-
Dock Select Panel Right: move the Select tree on the right column
-
Dock Edit Panel Left: move the Edit panel on the left column
-
Dock Add Panel Left: move the Add panel on the left column
-
Source: open the index.xml file of the current project in the Code Editor
-
Custom Css: open the custom.css file of the current project in the Code Editor
-
Client-Side Code: open the custom.css file of the current project in the Code Editor
-
Server-Side Code: open the Code Editor in the EVENTS folder
-
Advanced Mode: enable/disable Project Editor advanced mode, showing all the attributes or a selected number
-
Experimental Features: enable/disable Project Editor experimentale features
-
Deprecated Features: show/hide deprecated Project Editor features
-
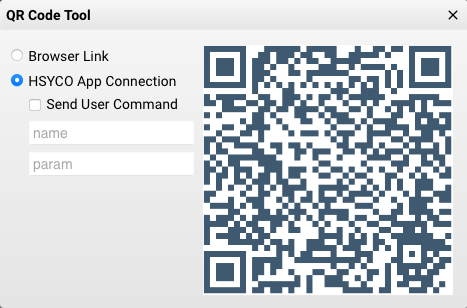
Qr: open the qr configuration popup where it's possibile to generate a qr for the URL to open the current project in a browser tab, or an URL for adding the current project to the HSYCO App or to generate a qr with an URL that sends an USER command to HSYCO
-
Welcome: open the Project Editor welcome screen
-
Toggle Fullscreen: activate or deactivate the full screen mode
-
Help: open the Project Editor docs
There are also some icon buttons for commonly used functions.
![]() Create a new project
Create a new project
![]() Open an existing project
Open an existing project
![]() Save the current project
Save the current project
![]() Return to the Manager splash screen
Return to the Manager splash screen