Getting Started with HSYCO
Let's discover HSYCO in less than 10 minutes.
Getting Started
Get started by creating a new HSYCO project.
What you'll need
- An HSYCO server
- A PC with a browser installed
Deploying
Follow this documentation for wiring and installation: HSYCO server installation
First Login
Turn on your HSYCO server and type this URL: https://192.168.1.50 or https://hsycoserver.local/. If the wizard is active you will see the wizard splash page.
If the wizard is not active you should access via this URL: https://192.168.1.50/hsycoserver/manager
Then skip the wizard steps and go to the the step by step first configuration.
Default login:
PIN: 00000
PUK: 00000 0000 0000
HSYCO is pre-configured with a static IP address, 192.168.1.50. If your LAN is not on this IP range, you will need to temporarily assign an IP address within this range to your PC, for example, 192.168.1.51 with a subnet mask of 255.255.255.0. This process varies depending on the operating system running on the pc you are using to configure HSYCO.
Because the SSL certificate used to secure the communication between the Web Browser and HSYCO SERVER is self-generated, you will be asked to accept the server's certificate. Follow your browser dialog boxes to permanently accept the certificate.
You can copy and paste PIN and PUK from a document directly in the LOGIN page.
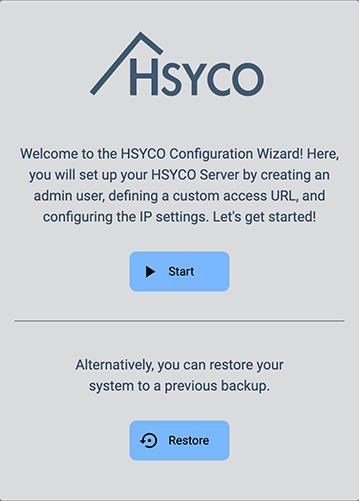
The First Installation Wizard
The HSYCO Wizard guides you through the initial setup of HSYCO with simple, step-by-step instructions.
Ther first step is the creation of ad administrator user.
- The
user IDmust be 4 to 16 letters and digits long, no spaces, no capital letters. PIN: the Personal Identification Number (PIN) is a five digit number that uniquely identifies the userPUK: the Personal Unlock Key (PUK) is a fourteen digit number that is used to create the initial peering between the web client and the serve
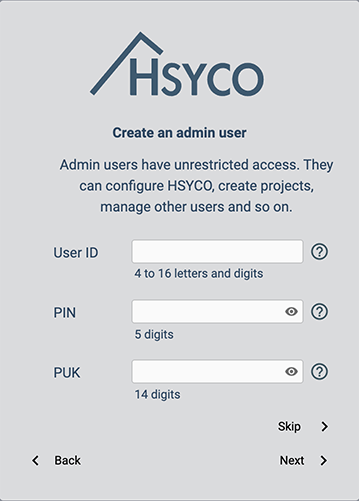
The default pre-configured PIN and PUK are 0000/00000000000000 for all HSYCO SERVERS, to let you conveniently access the user interface during the initial installation. You can skip the administrator user creation but we suggest not to do it and to create a new administration user in this phase of the configuration process.
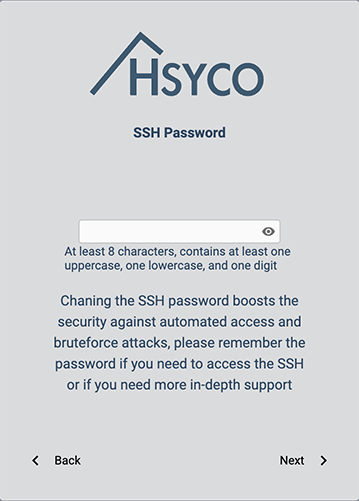
This password is the SSH secure protocol password. SSH is used to access the operating system’s console and, if needed, to manage files. The SSH protocol encrypts all traffic and can be safely used for remote management.
In order to guarantee the system safety and to prevent any unauthorized access it is essential to modify the access password of the HSYCO user before installing the system onto any not-secure LAN network.
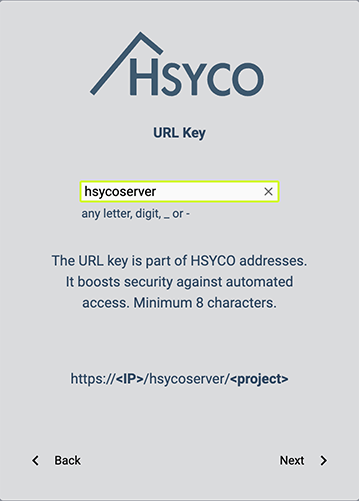
To protect against malicious service discovery robots, HSYCO does not answer to Web requests where only the server address is defined, for example https://192.168.1.50, but requires an extended URL, which must include an access key, called URLKey.
The URLKey must be at least 8 characters long.
The URLKey is not a secret password, but only an additional protection feature.
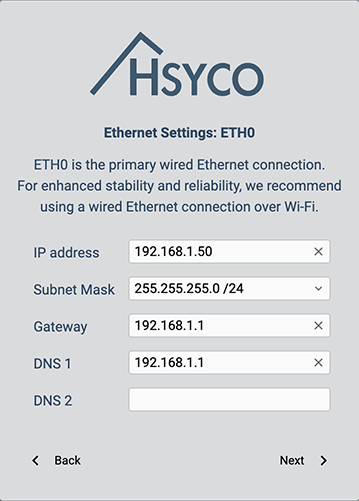
The next step is the network configuration. Depending on the hardware platform on which HSYCO is installed, it can have one or two Ethernet ports. In this section, you are only allowed to configure the ETH0 port. For additional Ethernet ports, there is a separate configuration section in the Manager Settings utility.
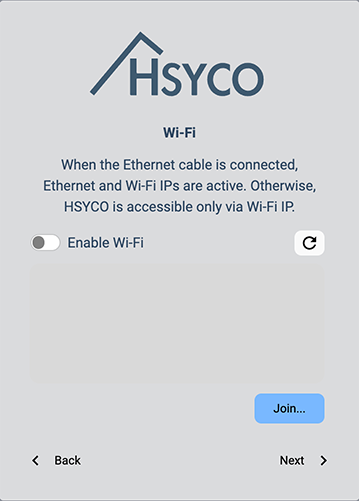
If the hardware platform on which HSYCO is installed has a Wi-Fi adapter, in this section it is possible to activate the Wi-Fi, then scan the area for available Wi-Fi networks, select an SSID, and enter the password to connect to it.
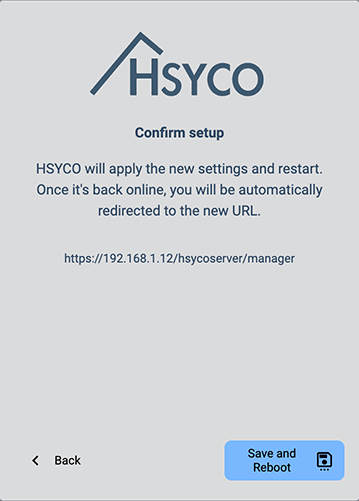
The Wizard ends by asking to save and reboot the configuration. HSYCO automatically re-starts, the execution of HSYCO is signalled by three consecutive high-pitch beeps. You will be automatically re-direct to HSYCO Manager splash screen.
Congratulations, you can now start using HSYCO and follow one of our tutorials.
Step By Step First Configuration
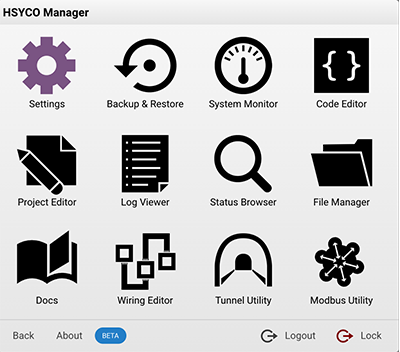
From the Manager splash screen select Settings
Then select Users
Users
By default, in cases where the initial configuration wizard has been skipped, a single user will exist, identified by the generic id: "user".
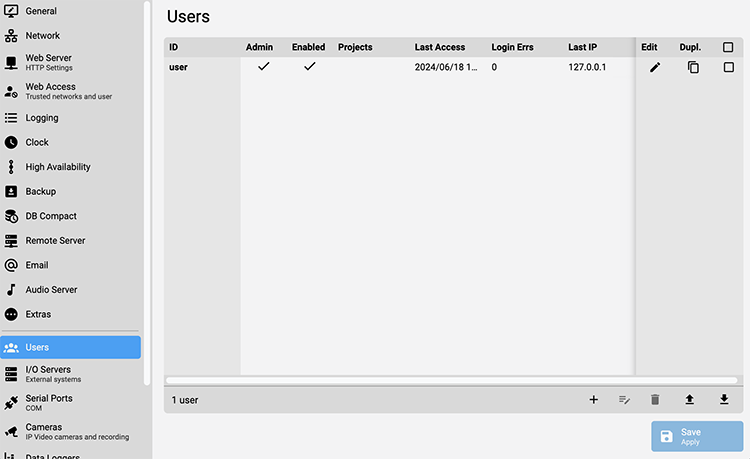
Click on + to add a new user.
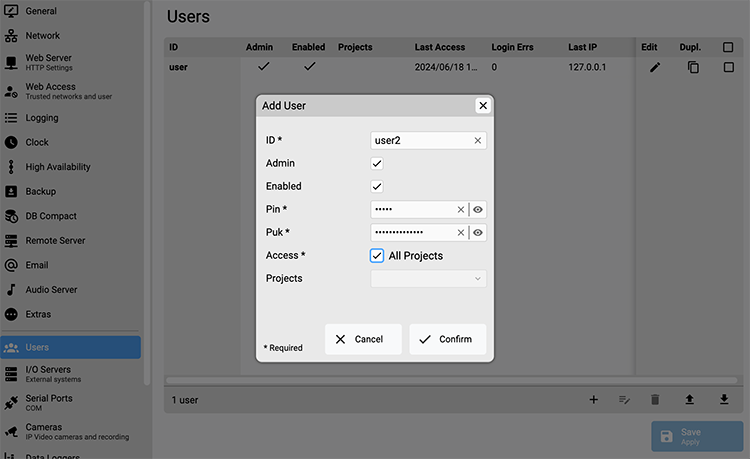
- User ID: the unique user id of your user (4 to 16 letters and digits)
- Administrator: administrators have access to the Manager interface. As we are in the process of creating a new administrative user, this checkbox must be selected
- Enabled: enable or disable the current user. Since we are creating a new user this checkbox must be selected.
- PIN: the Personal Identification Number (PIN) is a five digit number that uniquely identifies the user
- PUK: the Personal Unlock Key (PUK) is a fourteen digit number that is used to create the initial peering between the web client and the server
- Access: tick the chechbow to allow the access to all existing projects
- Projects: or you can select one by one the projects that the new user is allowed to access
Press Confirm to add the new user.
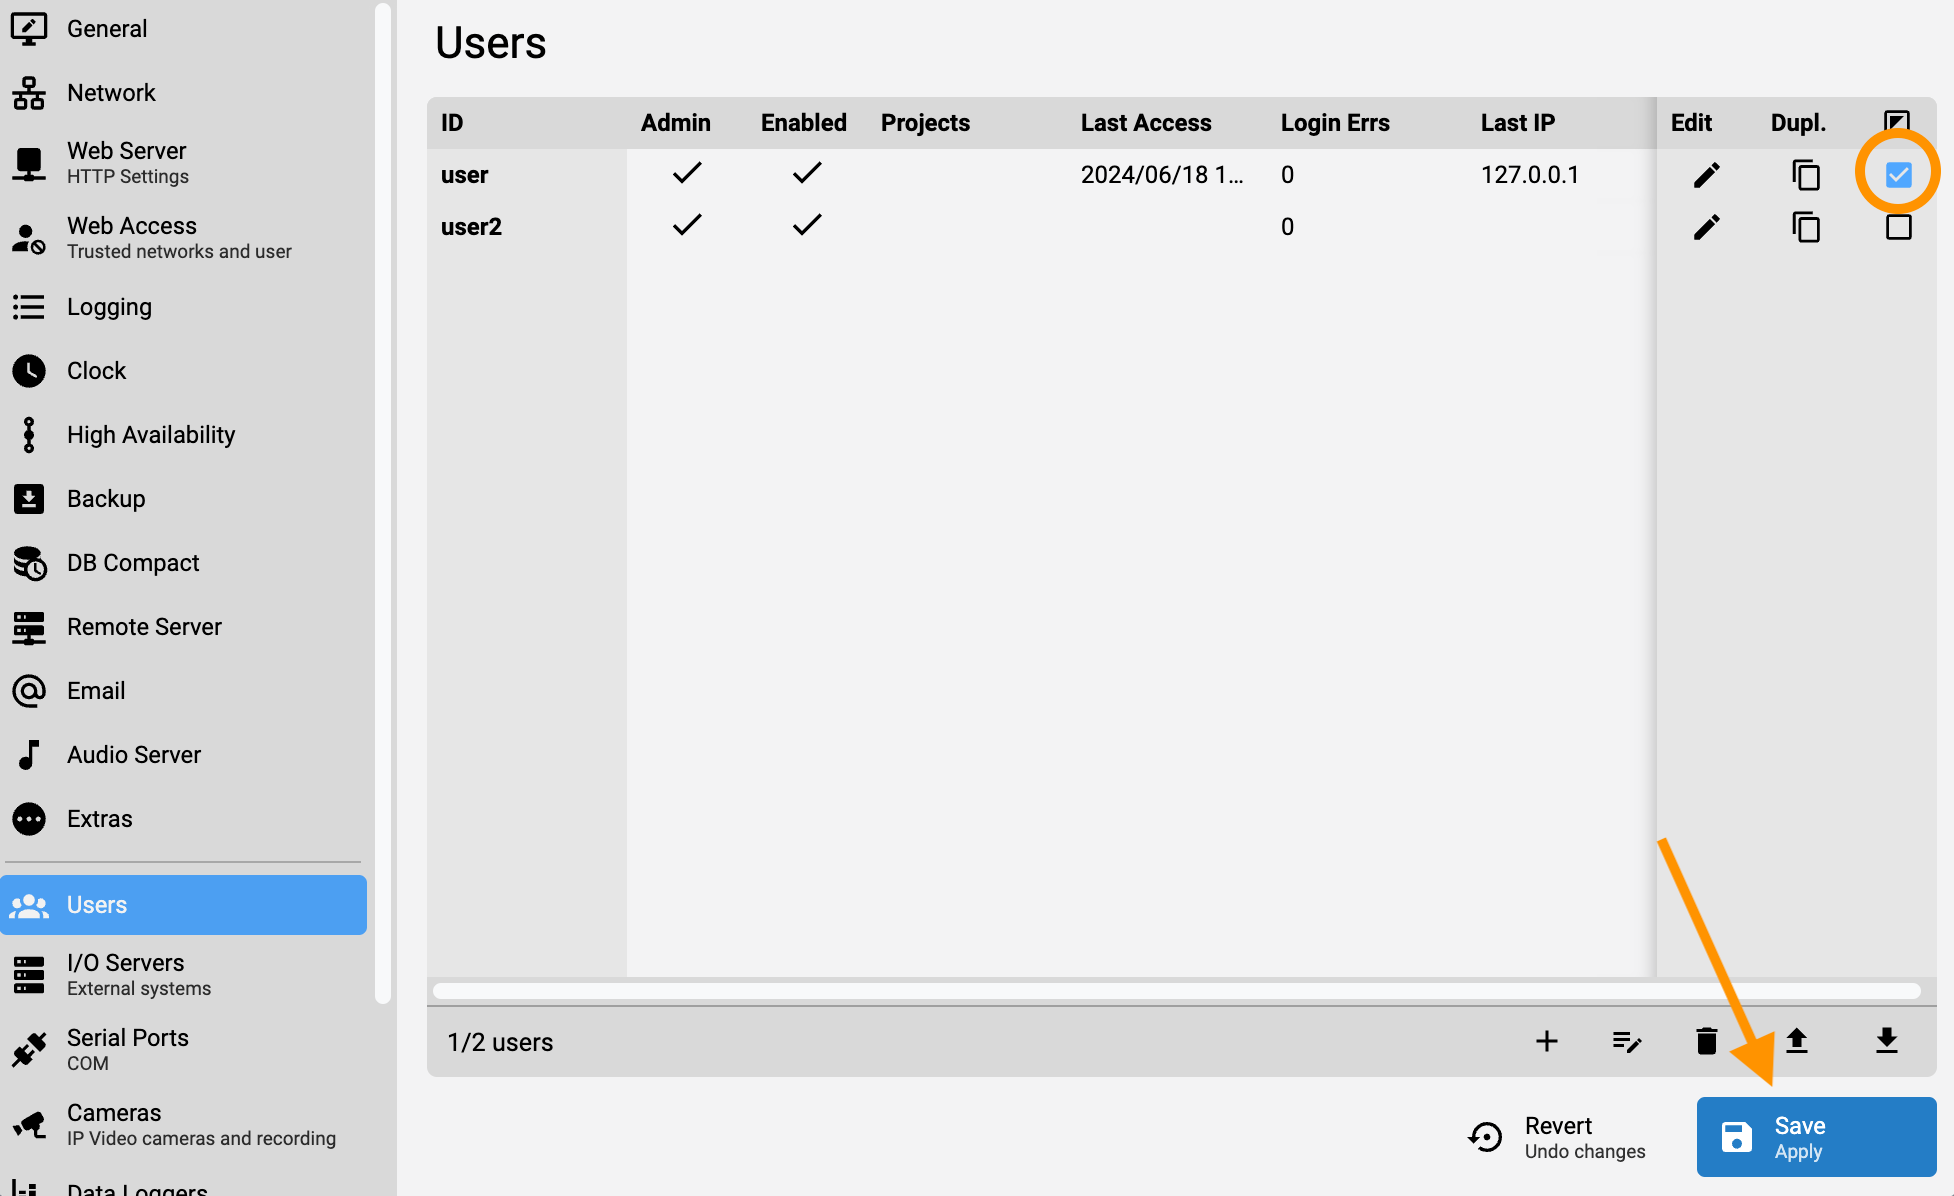
You should see 2 users in the users list.
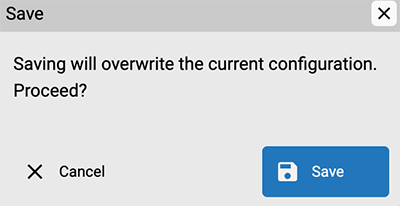
Press the Save button in the lower right corner to create the new user. A popup will appear to double ask for confirmation.
Now it's necessary to log out and log in with the newly created user. Click on this icon  to go back to che Manager splash screen then select Logout.
Login with the PIN/PUK credentials of the newly created user.
Select Settings then Users.
Select the default user.
Then delete it by pressing on the trash bin icon. Confirm deleting then, as seen before, click the Save button in the lower right corner.
The default pre-configured PIN and PUK are the same for all HSYCO SERVERS, to let you conveniently access the user interface during the initial installation. As illustrated in the preceding steps, both the PIN and PUK should be changed immediately to different, hard to guess numbers.
SSH Password
Let's go back to the Manager splash page and select Settings then General :
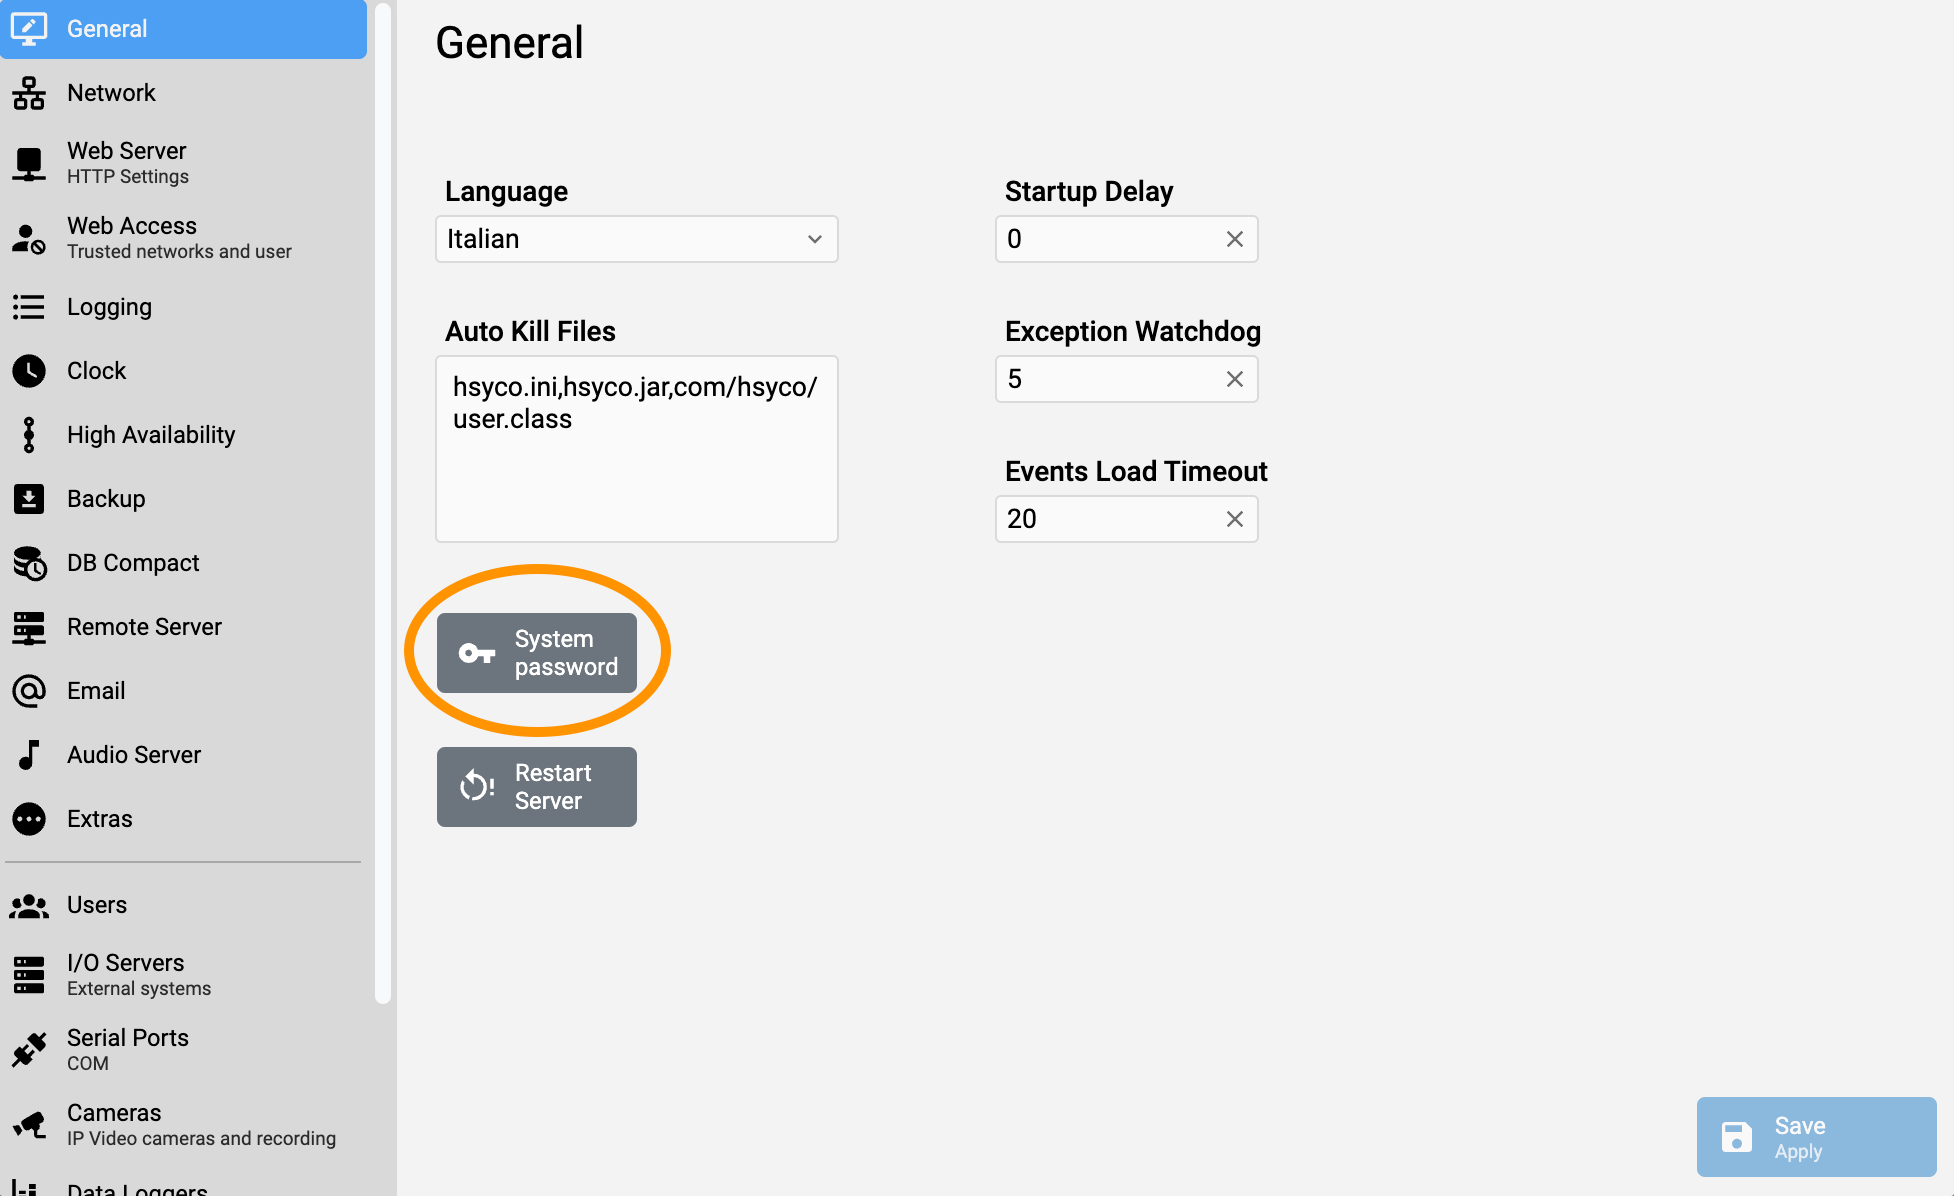
This password is the SSH secure protocol password. SSH is used to access the operating system’s console and, if needed, to manage files. The SSH protocol encrypts all traffic and can be safely used for remote management.
In order to guarantee the system safety and to prevent any unauthorized access it is essential to modify the access password of the HSYCO user before installing the system onto any not-secure LAN network.
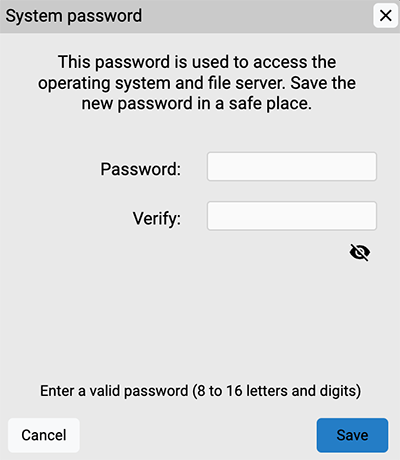
Enter a valid password (8 to 16 letters and digits) then press Save
Network Settings
Let us now proceed to the Network Settings in the Network section of the Settings :
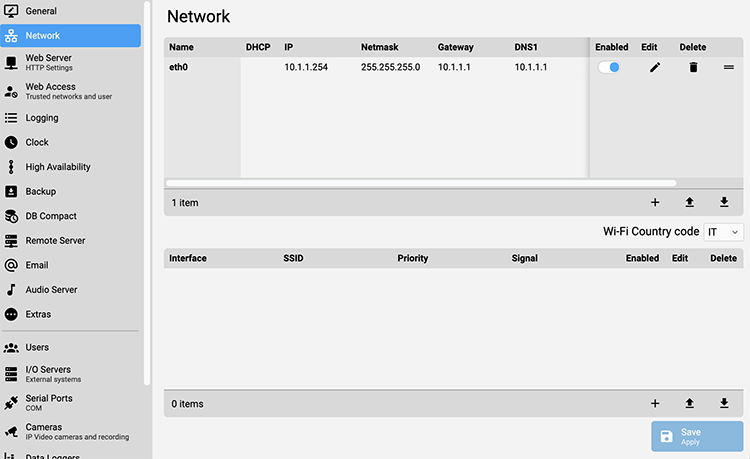
The upper table contains the list of Ethernet and Wi-Fi interfaces available on the HSYCO server. The list may vary from server to server, depending on the presence of one or two Ethernet ports and the Wi-Fi adapter.
The main Ethernet port is usually listed as 'eth0,' the secondary Ethernet port as 'eth1,' and so on. The Wi-Fi adapter, if present, is listed as 'wlan0.'
To add a new interface click on the + icon.
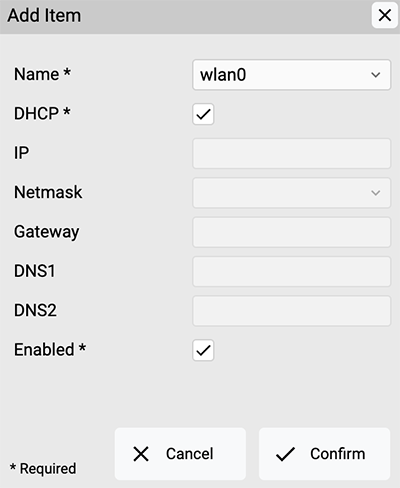
In this example we are adding a wlan0 interaface, configured in DHCP.
To change the network settings of an interface, select it then click on edit.
To add an additional IP on the same interface click the + icon then select an existing interface then add a new IP address.
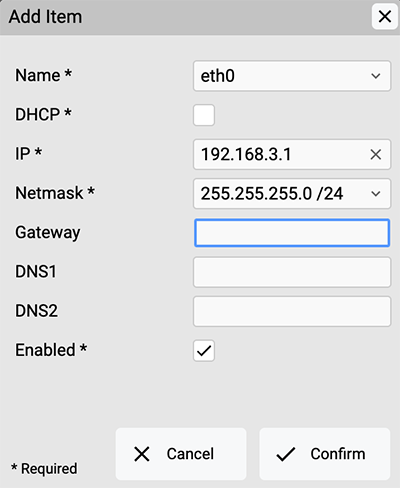
The additional IP address is listed with the ":n" suffix.
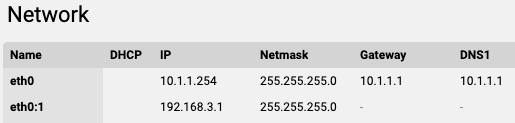
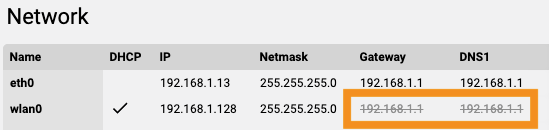
In the case of multiple interfaces, the first one (max priority) in the list has the router and DNS enabled. For other interfaces, the router and DNS are automatically disabled.
It is possible to change the priority order of an interface by clicking on the icon ![]() on the right side of the table, then dragging the selected row up or down."
on the right side of the table, then dragging the selected row up or down."
Wi-Fi SSIDs
The second table, the one on the lower side, shows the list of Wi-Fi SSIDs. You can add a new SSID my clicking on the + icon.
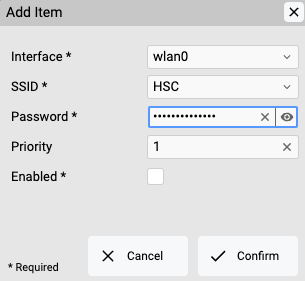
The priority field determines the connection order. HSYCO will first try to connect to the SSID with priority 1 and, in case of a connection failure, will proceed to the next ones in order.
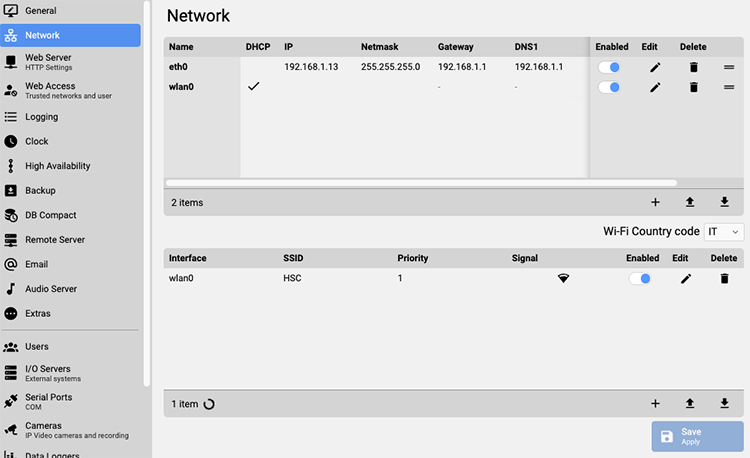
To confirm the new network settings, click on the Save button in the bottom right corner. After making the changes, you have 5 minutes to log in again to any HSYCO interface to confirm your changes.
HSYCO implements a safety mechanism that in most cases would automatically revert, after 5 minutes from the change, the network settings to the original configuration if for any reason network access to HSYCO is lost after a change.
Clock Settings
Finally, let's take a look at the clock settings under Settings then Clock:
By default the time is set to on HSYCO automatically by polling Network Time Protocol (NTP) servers.
To access the clock configuration the Time Auto Update must be disabled.

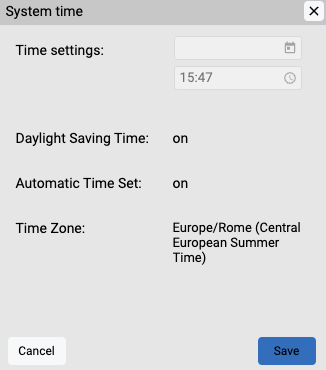
To change the time settings, enter the new parameters and press Save.
All the other parameters are read-only in this clock configuration popup, and can be set using the Settings menu, as explained in the Settings chapter.
Restoring a previous backup
To restore a previous backup read the Backup, Restore, Update section
Start using HSYCO
Now that HSYCO has a new user, a new SSH password, the network and clock settings have been checked, it's time to move on.
To proceed, let us return to the Manager's splash page by clicking on the icon ![]() located in the upper right corner of the interface.
located in the upper right corner of the interface.
In the splash scren the are multiple choices:
HSYCO is a highly customizable framework that can be employed in various capacities: as a supervisory interface, a pure gateway, a development environment without a final user interface, or a combination thereof. As a result, there is no prescribed sequence for configuring HSYCO; instead, you are free to commence from any of the potential options available.
If your objective involves creating a supervisory interface, we recommend following this tutorial:
Create your first project with HSYCO
However, if your intent is to delve into programming, then you may proceed with these tutorials:
If your are using HSYCO as a pure gateway, start from this section: