Step to step migration guide
This tutorial provides a step-by-step guide on how to upgrade an HSYCO version 3.x to 4.x:
Before updating
Before updating carefully check the list of removed features:
- Squeezebox - see wiki 3.8
- Redirect variables - see wiki 3.8
- Custom objects and css in the www folder - see wiki 3.8
- IRTrans databases stored in the
irfolder - see wiki 3.8 - IRTrans buttons - see wiki 3.8
- Project style attribute - see wiki 3.8
Before updating carefully check the list of deprecated features :
- Include - see wiki 3.8
- DMX - see wiki 3.8 and see wiki 3.8
- Image object with link action - see wiki 3.8
Browser Minimum Requirements:
- Chrome: Version 67 (released May 2018)
- Chrome Android: Version 67 (released May 2018)
- Safari: Version 10.3 (released Mar 2017)
- Safari iOS: Version 10.3 (released Mar 2017)
- Firefox: Version 63 (released Oct 2018)
- Edge: Version 79 (released Jan 2020)
- Opera: Version 41 (released Oct 2016)
Please be aware that if your installation includes touchscreen (or other) devices, they may have older browser versions that are not compatible with HSYCO version 4
Changes in www folder
The www folder has a new directories structure.
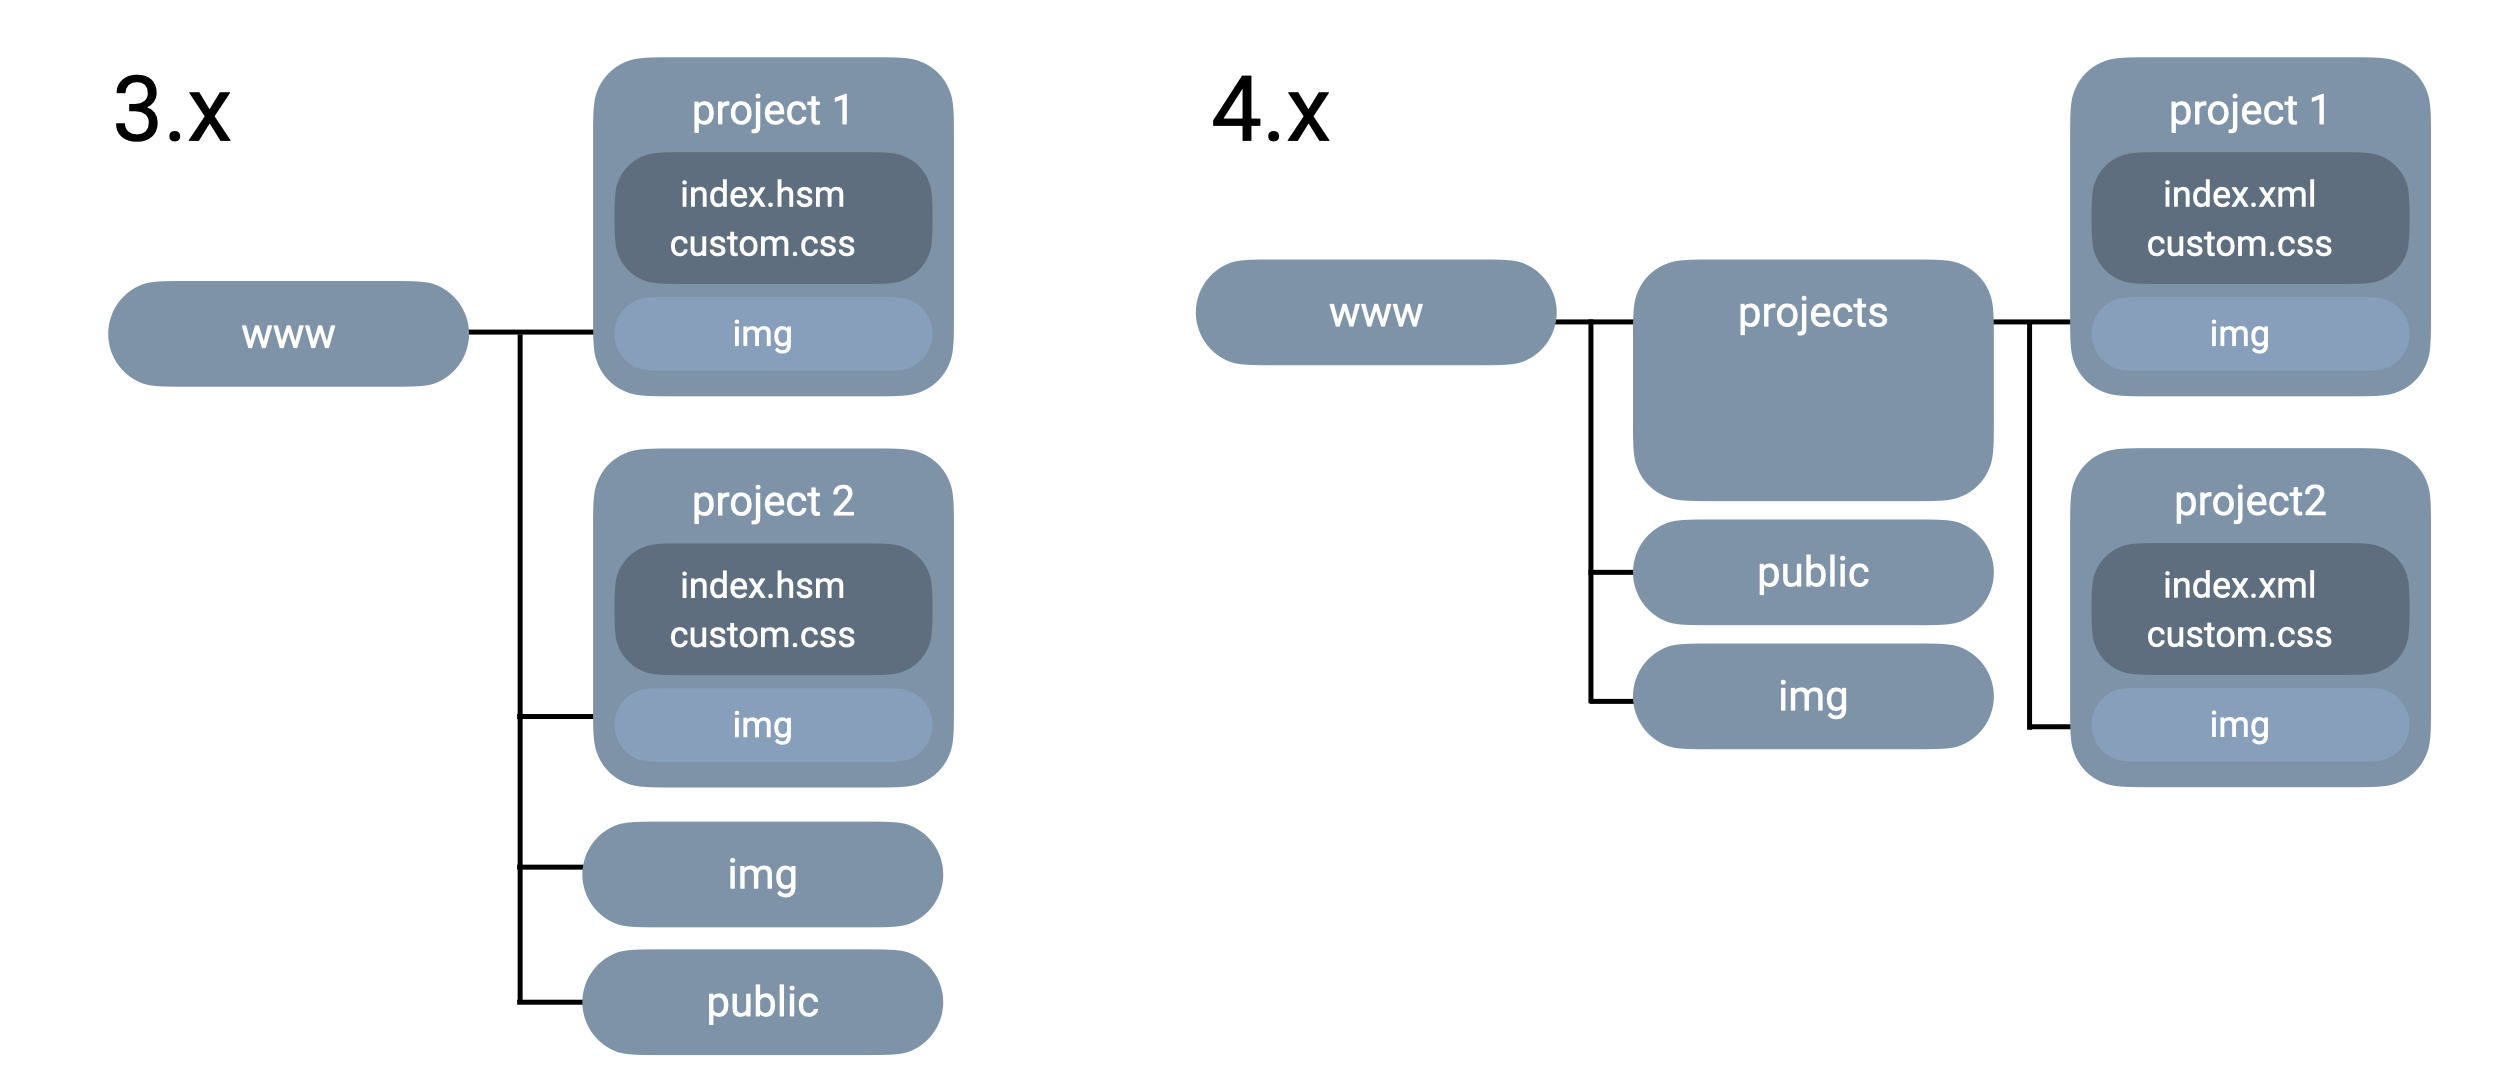
The Project Editor migration tool facilitates the transition of your legacy 3.x project into the new folder structure. It's crucial to verify that there's no usage of Java or Javascript code for parsing the previous 'www' directory. If such code exists, it needs to be updated to reflect the new directory paths. The existing 'index.hsc' file will be preserved within the same folder as the newly introduced 'index.xml' file.
Additionally, ensure to assess your current HSYCO version. If it's any of the versions 3.0, 3.1, 3.2, 3.3, 3.4, 3.5, or 3.6, it's recommended to first upgrade to either version 3.7 or 3.8 before proceeding with the migration to version 4.x.
Changes in project structure
Projects are automatically converted to the new format when accessed in a browser or saved from the manager.
A legacy mode is automatically enabled for the converted project (as a project attribute). This mode allows the project to run without any changes, but it's recommended to disable it and update the project to the new format.
Skins
All skins are now merged into a single skin: default. We introduced themes to customize colors and other visual aspects of the interface. 3.x skins are automatically migrated to the new skin structure.
Panel objects
Panel UI Objects in the 3.x bright skin were semi-transparent. In version 4.x, panels in any theme are always opaque.
To maintain the same appearance, the opacity value is automatically set to 0.8 during the project conversion. Mind that if you use the opacity UISet, its value has to be adjusted to achieve the same effect.
Panel can no longer be sized at less than 16x16 pixels, unless the legacy mode is enabled. We advice to use the shape object to create smaller objects.
Containers
Containers now have a minimum size. On conversion, if the container size is not set (width and height are 0), the size is set to the minimum size.
This affects only rotated containers (rotation attribute), since the rotation origin changes with the container size.
Rotation can now be applied directly in the Project Editor, without the need to use the rotation attribute. If rotation needs to be dynamic, the container will first have to be repositioned.
Keypad
Keypad objects are automatically converted to field objects with type keypad. If the text attribute
Changes in database organization
In HSYCO 4.x we improved performance with very large data sets. This update alters the way DLs (Data Logs) are stored in the database in the /data folder. Each DL now has its dedicated table. During the system startup, data migration is performed, which may take some time if the data volume is significant. With this version update, reverting to the previous version will result in the deletion of old tables (DL_RANGE and DL_COUNTER), leading to the loss of DL data.
Table Naming Convention
The naming convention for the tables is as follows:
dl_<range | counter>_<id>
where <id> represents the DL's ID as specified in hsyco.ini. It is always in lowercase, and any characters other than letters (a-z) and digits are converted to underscores (_).
tableName = "dl_counter_" + id.toLowerCase().replaceAll("[^A-Za-z0-9_]", "_");
Updating HSYCO version
Download the latest beta or stable version of HSYCO 4.x from this docs.
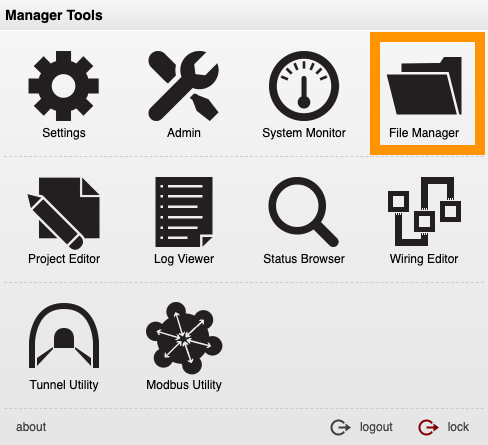
Open the Manager interface on your HSYCO 3.x then access the File Manager.
Drag and drop (or press the upload files button) the downloaded hsyco.jar file in the root folder of HSYCO.
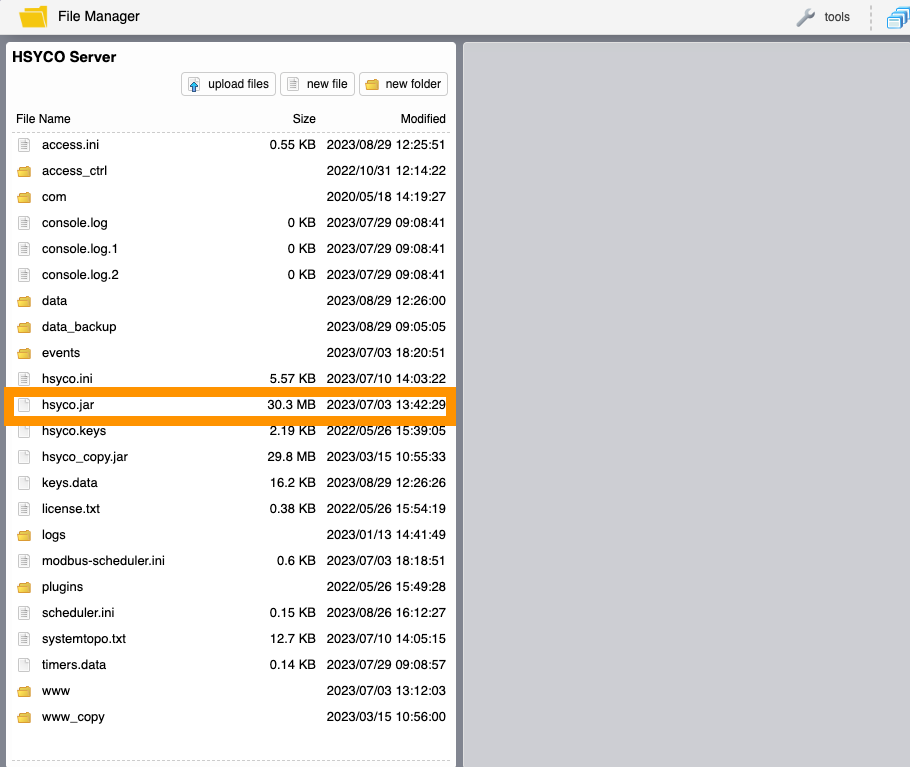
Once the upload process is complete, the HSYCO process will restart, and the version 4.x will become operational.
Projects conversion
Let's assume that within the 'www' folder of the 3.x project, there's a project named 'myinterface'. This project will be automatically converted into the new HSYCO 4.x format when it's accessed in a browser via the URL https://hsyco-ip-address/hsycoserver/myinterface.
No alterations will be made to the original index.hsm file; it will only be relocated to the 'myinterface' directory under 'www > projects'.
At this point, we recommend opening the project with the Project Editor to ensure that the conversion has been successful.
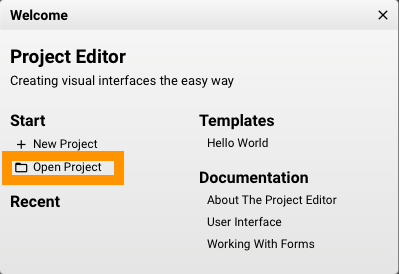
Open a project:
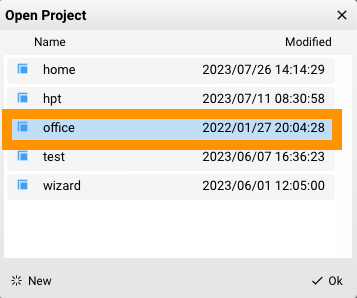
The project will be migrated from version 3.x to version 4.x A disclaimer popup will appear:
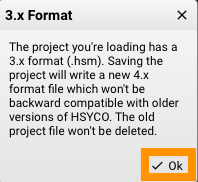
The migration process could take some time. After the process is completed the Project Editor needs to be restartd, press "ok".
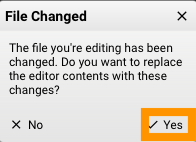
By clicking the Save button located in the upper right corner, the converted index.hsm file will be saved under 'www > project':
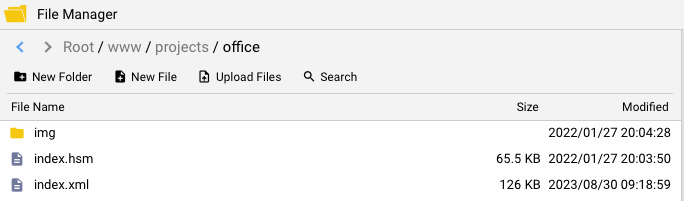
The old index.hsm file is saved in the same folder.
Files Structure
Other than the 'www' folder, there are no other changes to the file structure of HSYCO software, except for the addition of a '.tmp' folder containing temporary files.
EVENTS, Javascript, Java programming
The syntax, commands, and callbacks in EVENTS, Javascript, and Java programming remain unchanged during the transition from HSYCO 3.x to version 4.x.
HSYCO 4.x adopts a new interface objects color system. While the old system with its "style" attributes still works, it's advisable to migrate to the new system. For more information please see Color System.
Redirect Vars
HSYCO 4.x drops the support for Redirect Vars.
The same functionality can be achieved using the new "Value Bindings" feature. Value bindings are multi-line expressions that can be used to set the value of an attribute dynamically, with the support of functions and operators. The converter will automatically migrate Redirect Vars to Value Bindings, while keeping the existing Redirect Vars uiSets working. This is done by adding a Value Binding on the same attribute (e.g. ID, Server ID, Address, Zone...), with a different syntax.
Here's a comparison between the two:
| Redirect Vars | Value Bindings | Notes |
|---|---|---|
[varname] | ui("redirect", "varname") | The ui function is used to access the value of the redirect.varname uiSet. |
temp.[varname] | "temp" + ui("redirect", "varname") | Values can be prefixed or suffixed by concatenating strings. |
temp.[varname].10 | "temp" + ui("redirect", "varname") + "10" | A suffix example. |
temp.[varname].10.[varname2] | "temp" + ui("redirect", "varname") + "10" + "temp" + ui("redirect", "varname2") | Multiple values can be concatenated. |
While there's no need to change the existing Redirect Vars, changes to existing projects and new projects require the use of Value Bindings to achieve the same functionality.
Downgrading HSYCO
If it becomes necessary to downgrade from version 4.x to 3.x, it can be done following the same procedure as the upgrade.
Open the File Manager and upload an hsyco.jar version 3.x.
Once HSYCO is restarted, delete the 'www' folder and restore the previous 'www' folder from version 3.x by uploading a www.zip file into the main HSYCO folder. The file will be automatically unzipped, restoring the interfaces.