Chapter 2: Installation and Setup
HSYCO is delivered as a preconfigured HSYCO Server, designed to be powered on and accessed through a web browser.
In this chapter, we’ll walk through what actually happens when you bring an HSYCO server online for the first time: how to access it, how the initial configuration works, how networking is handled, where files are stored, and how to protect your work with backups.
By the end of this chapter, your HSYCO server will be accessible on your network with secure credentials, and you'll understand how to maintain configuration backups. You'll be ready to begin the actual automation work, connecting to building systems and creating user interfaces, covered in subsequent chapters.
2.1 Bringing an HSYCO Server Online
HSYCO is delivered as a preconfigured server system. The Linux operating system (Debian or Raspberry Pi OS, depending on your model) is installed, Java is configured, and HSYCO itself is pre-loaded. There's no software to download, no installers to run, no complex setup procedures. Your job is straightforward: provide power, connect network, access the web interface.
This simplicity reflects HSYCO's design philosophy. Rather than distributing software for users to install on various hardware configurations, HSYCO arrives as an integrated system. You're not managing a general-purpose computer that happens to run automation software; you're deploying an appliance designed specifically for building automation.
2.1.1 Power and Network Connections
The startup procedure varies slightly across different hardware models, though the fundamental process remains the same: connect power, connect network, listen for the three beeps that signal successful initialization.
Starting Pi Family Servers (Base, UPS, CM, CM Duo)
Pi Base, Pi UPS, Pi CM, and Pi CM Duo all follow identical startup procedures: simply plug in the power supply. HSYCO starts automatically without requiring any power button press or boot sequence initiation.
On Pi Base and Pi UPS models, the system signals when it's ready with three consecutive high-pitch beeps. On Pi CM and Pi CM Duo models, which do not have a buzzer, the L1 LED blinks instead to signal successful initialization.
For network connectivity, connect an Ethernet cable to the single Ethernet port.
Starting PRO, ENTERPRISE, and CORE Servers (Strato Pi Max)
To start the server, plug the power supply and connect the Ethernet cable to the LAN1 port. HSYCO automatically starts. The startup behavior matches the Pi family: plug in power, and HSYCO starts automatically, signaling readiness with three beeps.
These models provide visual feedback through LED indicators that Pi models lack.
-
The USR LED blinks green when running from the NVMe storage (normal operation).
-
The USR LED blinks red when running from eMMC (fallback mode).
-
The PWR LED glows blue when power is present.
-
The red and green ACT LEDs replicate the LEDs of the Raspberry Pi.
If boot errors occur, the ACT LED flashes specific patterns that can be decoded using Raspberry Pi documentation, though this is rarely necessary during normal operation.
2.1.2 The Default Network Configuration
Every HSYCO SERVER, regardless of model or generation, ships with identical network settings:
-
IP address: 192.168.1.50
-
Subnet mask: 255.255.255.0
-
Default Gateway: 192.168.1.1
-
DNS: 192.168.1.1
If your network uses a different address range, temporarily assign your computer an address in the 192.168.1.x range, 192.168.1.51 with subnet mask 255.255.255.0, for example. This lets you reach the HSYCO server, access the web interface, and update its network settings to match your network. The steps for changing your computer's IP address vary by operating system, but the concept is the same on all platforms.
Alternatively, you can try accessing the server by hostname using https://hsycoserver.local/, this may work on some networks without any IP reconfiguration on your part.
After you've accessed HSYCO and updated its network settings to match your environment, return your computer to its normal configuration. This temporary reconfiguration is a one-time task during initial deployment. No additional services or software need to be installed; a standard web browser is sufficient.
Once the HSYCO server is reachable on your network, you can proceed to access its web interface and begin initial configuration.
2.1.3 Accessing the Web Interface
Once the HSYCO server is powered on and reachable on the network, all interaction with the system takes place through the web browser. HSYCO does not require any client-side software installation.
The web interface is accessed over HTTPS. For a factory-configured system, navigate to:
https://192.168.1.50/hsycoserver/
Alternatively, you can use:
https://hsycoserver.local/hsycoserver/
/hsycoserver/ can also be dropped; the Wizard will be opened.
2.1.4 SSL Certificate Acceptance
Your browser will display a security warning on first access. This is expected behavior, not a problem. When the SSL certificate is generated by HSYCO, it is not signed by a Certification Authority recognized by the browser, so the browser cannot guarantee the identity of the server. By accepting the certificate, the connection is established and you may proceed.
Even with self-generated certificates, all exchanged data is protected by the same level of cryptography as with signed certificates. Follow your browser's prompts to permanently accept the certificate.
Tip: On some browsers and operating systems, Safari on iOS in particular, permanently importing the self-generated certificate into the local keystore can improve usability. Once stored, the browser will accept the connection without asking for confirmation on future visits. To download the certificate's public key in PEM format, click the link in the logout panel and follow your operating system's instructions.
2.1.5 Authentication and Next Steps
What you see after accepting the certificate depends on whether the setup wizard is enabled on your server. If the wizard is active, its splash page appears and guides you through initial configuration. If the wizard is not enabled, or if you choose to skip it, access the Manager directly at:
https://192.168.1.50/hsycoserver/manager
The factory default credentials are the same across all HSYCO SERVERS:
-
PIN:
00000(five zeros) -
PUK:
00000 00000 0000(fourteen zeros, often written with spacing for readability)
The PIN (Personal Identification Number) is a five-digit code identifying users. The PUK (Personal Unlock Key) is a fourteen-digit code creating secure pairing between web browsers and the HSYCO server. If your clipboard contains text with a five-digit number or combined five-digit plus fourteen-digit numbers, you can paste directly into the authentication page, HSYCO will extract and fill in the PIN and PUK automatically.
Note: These default credentials are identical across all HSYCO SERVERS. They exist for installation convenience but must be changed immediately. The setup wizard (Section 2.2) or manual configuration (Section 2.3) will guide you through establishing secure credentials.
Note: If you misconfigure network settings and lose web access, the Configuration Console, covered at the end of this chapter, provides recovery tools, including a function that restores the factory default IP address.
2.2 The Setup Wizard
The HSYCO Wizard guides you through initial setup with a sequence of configuration screens, covering security fundamentals before network connectivity. The wizard is optional, you can configure everything manually through the Manager (Section 2.3), but it ensures you address the critical security steps before the server enters production use.
If the wizard is active on your server, it launches automatically after you accept the SSL certificate (Figure 2). If it doesn't appear, proceed to Section 2.3.
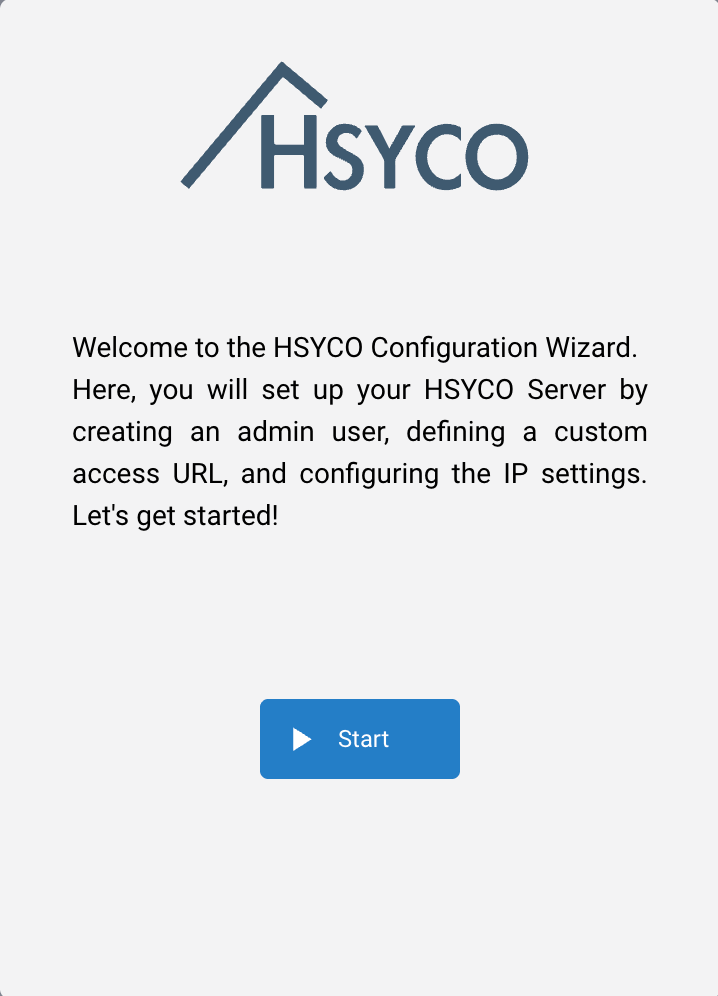
The HSYCO setup wizard splash screen
2.2.1 Wizard Configuration Steps
Creating an Administrator User
The wizard's first step creates a new administrator account. This step is technically optional, the wizard allows you to skip it, but creating a new administrator user during this phase is recommended.
The wizard presents fields for:
User ID: the unique identifier for your account. Must be 4 to 16 letters and digits, with no spaces and no capital letters.
PIN: a five-digit number.
PUK: a fourteen-digit number.
After filling in these fields (Figure 3), proceed to the next wizard screen.
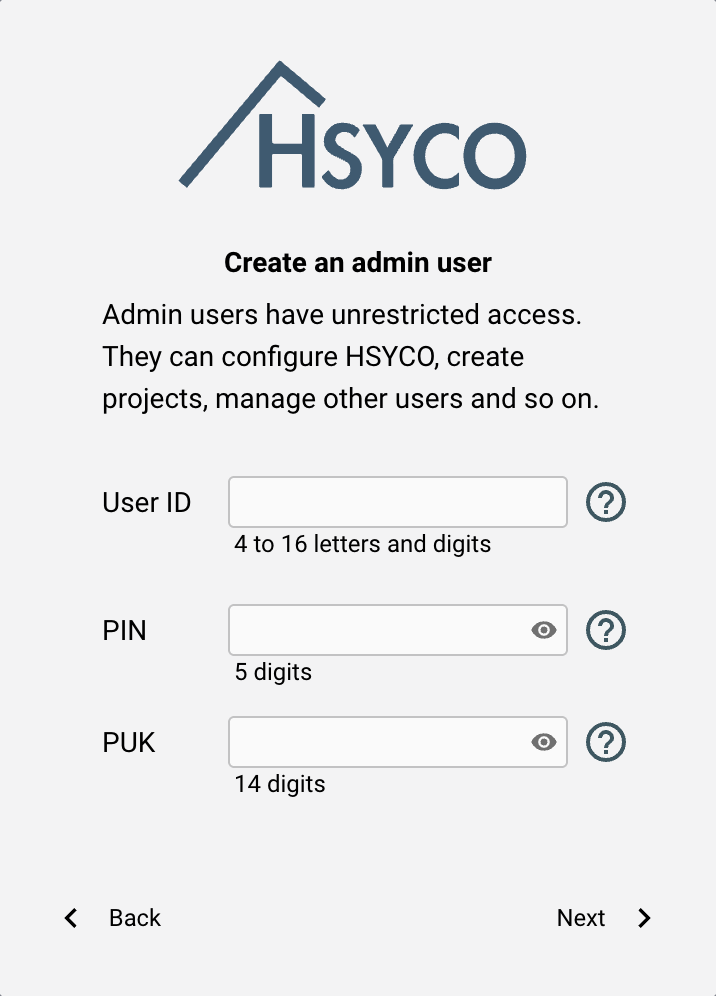
Wizard step: creating an administrator user
Note: User IDs must be 4 to 16 letters and digits, with no spaces and no capital letters.
Tip: Write down your PIN and PUK and store them somewhere secure. If a user's PIN and PUK are forgotten or lost, it will be necessary to delete the user and create a new one.
Setting the SSH Password
The second wizard screen configures the SSH password (Figure 4). SSH (Secure Shell) provides access to the operating system's console and file management capabilities. The SSH protocol encrypts all traffic and can be safely used for remote management.
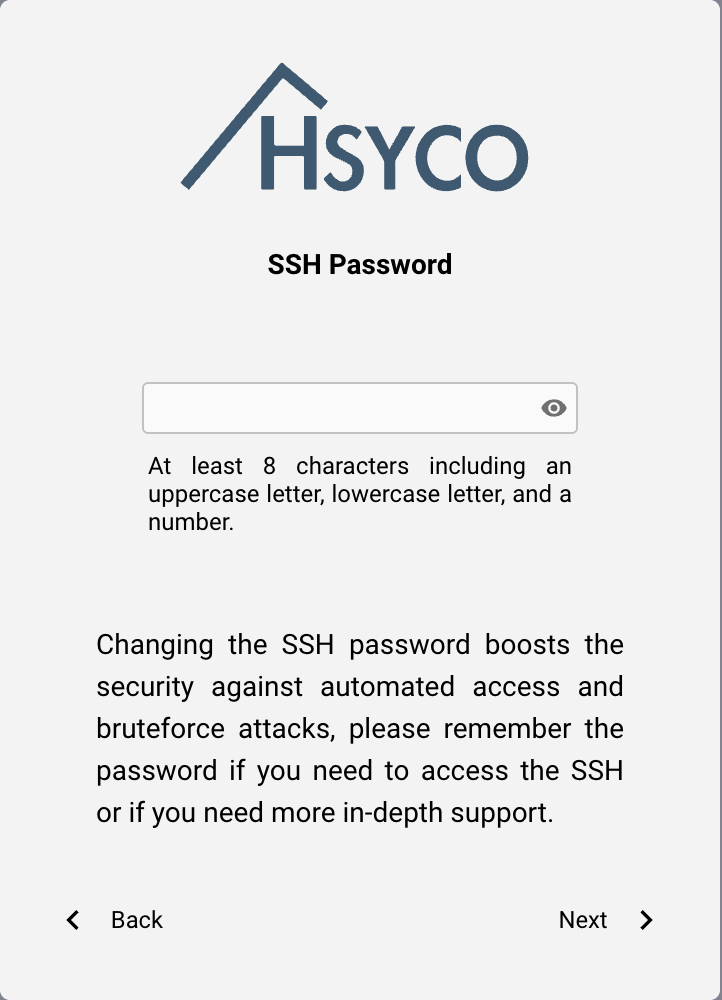
Wizard step: setting the SSH password
The factory default SSH credentials are username hsyco with password hsycoserver. The wizard presents a password field where you enter a new password that must be 8 to 16 letters and digits.
In order to guarantee system safety and to prevent unauthorized access, it is essential to change the SSH password before installing the server on any unsecured network.
Tip: Write down your SSH password and store it securely. SSH access is needed infrequently, usually during troubleshooting or advanced configuration, but if you forget it you will need physical access to the server to recover.
Configuring the URLKey
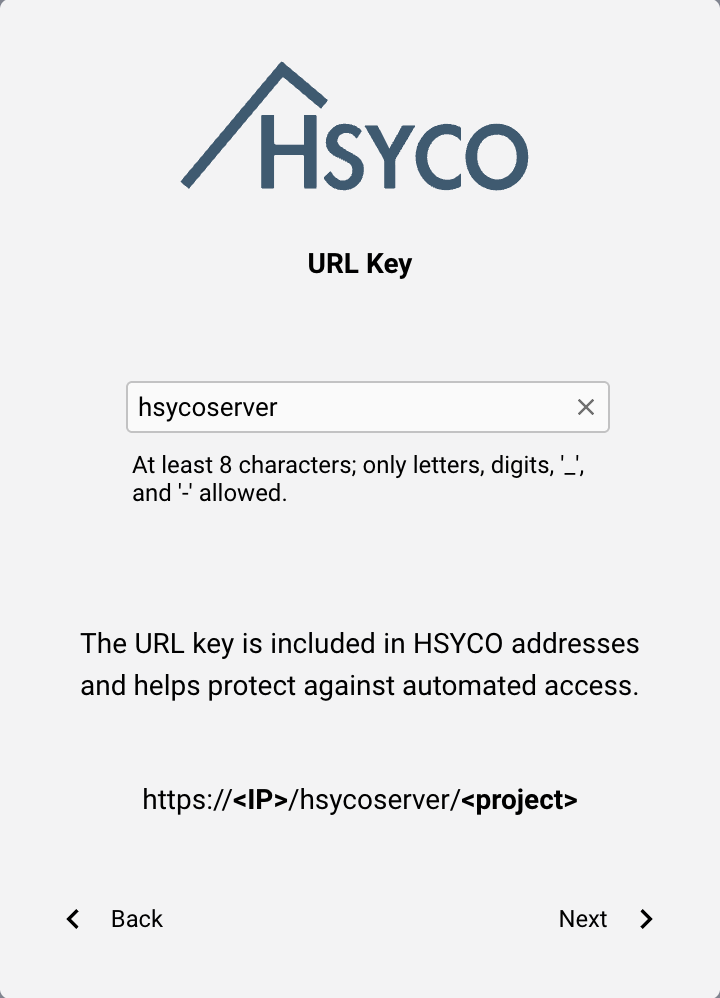
Wizard step: configuring the URLKey
The third wizard screen lets you set your own URLKey (Figure 5), replacing the factory default hsycoserver you've been using to access HSYCO so far (see Section 2.1.3). It must be at least 8 characters long. After setting it, you'll access HSYCO using URLs like https://192.168.1.50/yourURLkey/projectname.
You can specify multiple URLKeys separated by commas; all specified keys will be valid for web access to HSYCO.
Network Configuration
The next wizard screen configures network settings (Figure 6). Depending on the hardware platform, your server may have one or two Ethernet ports. The wizard displays the current network configuration (initially the factory defaults: 192.168.1.50) and provides fields to modify the IP Address, Subnet Mask, Gateway, and DNS. You can configure the server to use DHCP or specify static values.
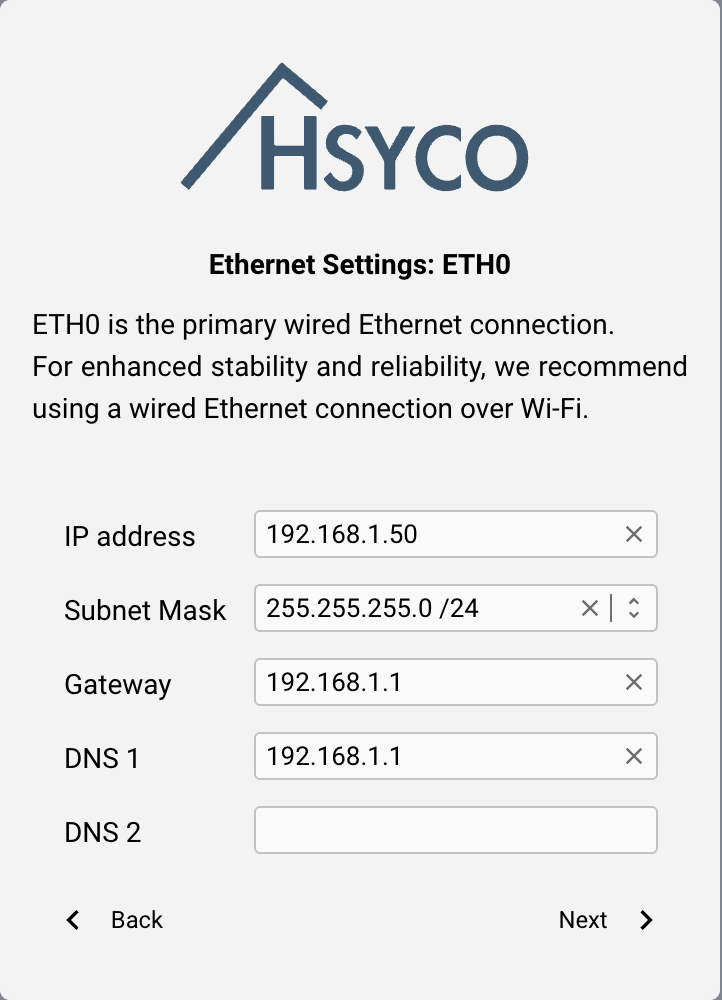
Wizard step: network configuration
Note: HSYCO implements a safety mechanism that automatically reverts network settings to the original configuration after 5 minutes if network access to HSYCO is lost after a change. After changing network settings, you have 5 minutes to log in again to any HSYCO interface to confirm your changes. If you don't reconnect within 5 minutes, the system rolls back.
Wi-Fi Configuration
If your HSYCO Server hardware includes a Wi-Fi adapter, the wizard presents an additional screen for Wi-Fi configuration. This screen appears only if the hardware supports it.
From this screen you can activate Wi-Fi, scan for available Wi-Fi networks, select an SSID from the discovered networks, and enter the password to connect. If you configure Wi-Fi, it is added as a secondary network interface. The primary Ethernet configuration remains active, and HSYCO can operate on both interfaces simultaneously.
Tip: Even if you plan to use Wi-Fi as the primary connection, configure Ethernet first.
2.2.2 Completing the Wizard
The wizard ends by asking to save and reboot the configuration. HSYCO automatically restarts, the execution of HSYCO is signalled by three consecutive high-pitch beeps. You will be automatically redirected to HSYCO Manager splash screen.
If you created a new administrator user in the wizard's first step, the system now has two users: your new administrator and the default user. You should log in with your new administrator credentials and then delete the default user through the Manager interface. Section 2.3 covers this process in detail.
2.3 Manual Configuration
If the setup wizard isn't active on your server, or if you prefer direct control over configuration rather than following a guided sequence, you'll configure HSYCO manually through the Manager interface.
Manual configuration follows the same essential steps as the wizard, creating an administrator user, changing the SSH password, and configuring network settings, but you navigate the Manager interface directly. Navigate to https://192.168.1.50/hsycoserver/manager and log in.
HSYCO supports two authentication modes: PIN/PUK and username/ password. The factory default mode accepts both, presenting PIN/PUK as the preferred option. Use the factory default credentials: PIN 00000, PUK 00000 00000 0000.
After successful authentication, the Manager splash screen appears, providing access to Settings, Backup/Restore/Update, Project Editor, File Manager, Code Editor, Log Viewer, Status Browser, System Monitor, Wiring Editor, Catalog, and Docs. Additional utility tools appear when specific I/O Servers are enabled.
Note: If your server is configured to use username/password authentication instead of PIN/PUK, the login screen will look different. The AuthenticationMode setting in Settings → Web Access controls which method is presented.
2.3.1 User Management
From the Manager splash screen, select Settings, then select Users. By default, when the initial configuration wizard has been skipped, a single user exists with the generic ID user.
Creating a New Administrator User
Click the + icon to add a new user. The user creation form appears with several fields (Figure 7):
-
User ID: The unique identifier for your user account. This must be 4 to 16 letters and digits. No spaces, no capital letters.
-
Administrator: Check this box. Administrators have access to the Manager interface. Since you're creating a new administrative user to replace the default account, this checkbox must be selected.
-
Enabled: Check this box to activate the user account.
-
PIN: Enter a five-digit number that uniquely identifies the user.
-
PUK: Enter a fourteen-digit number used to create initial peering between the web client and the server.
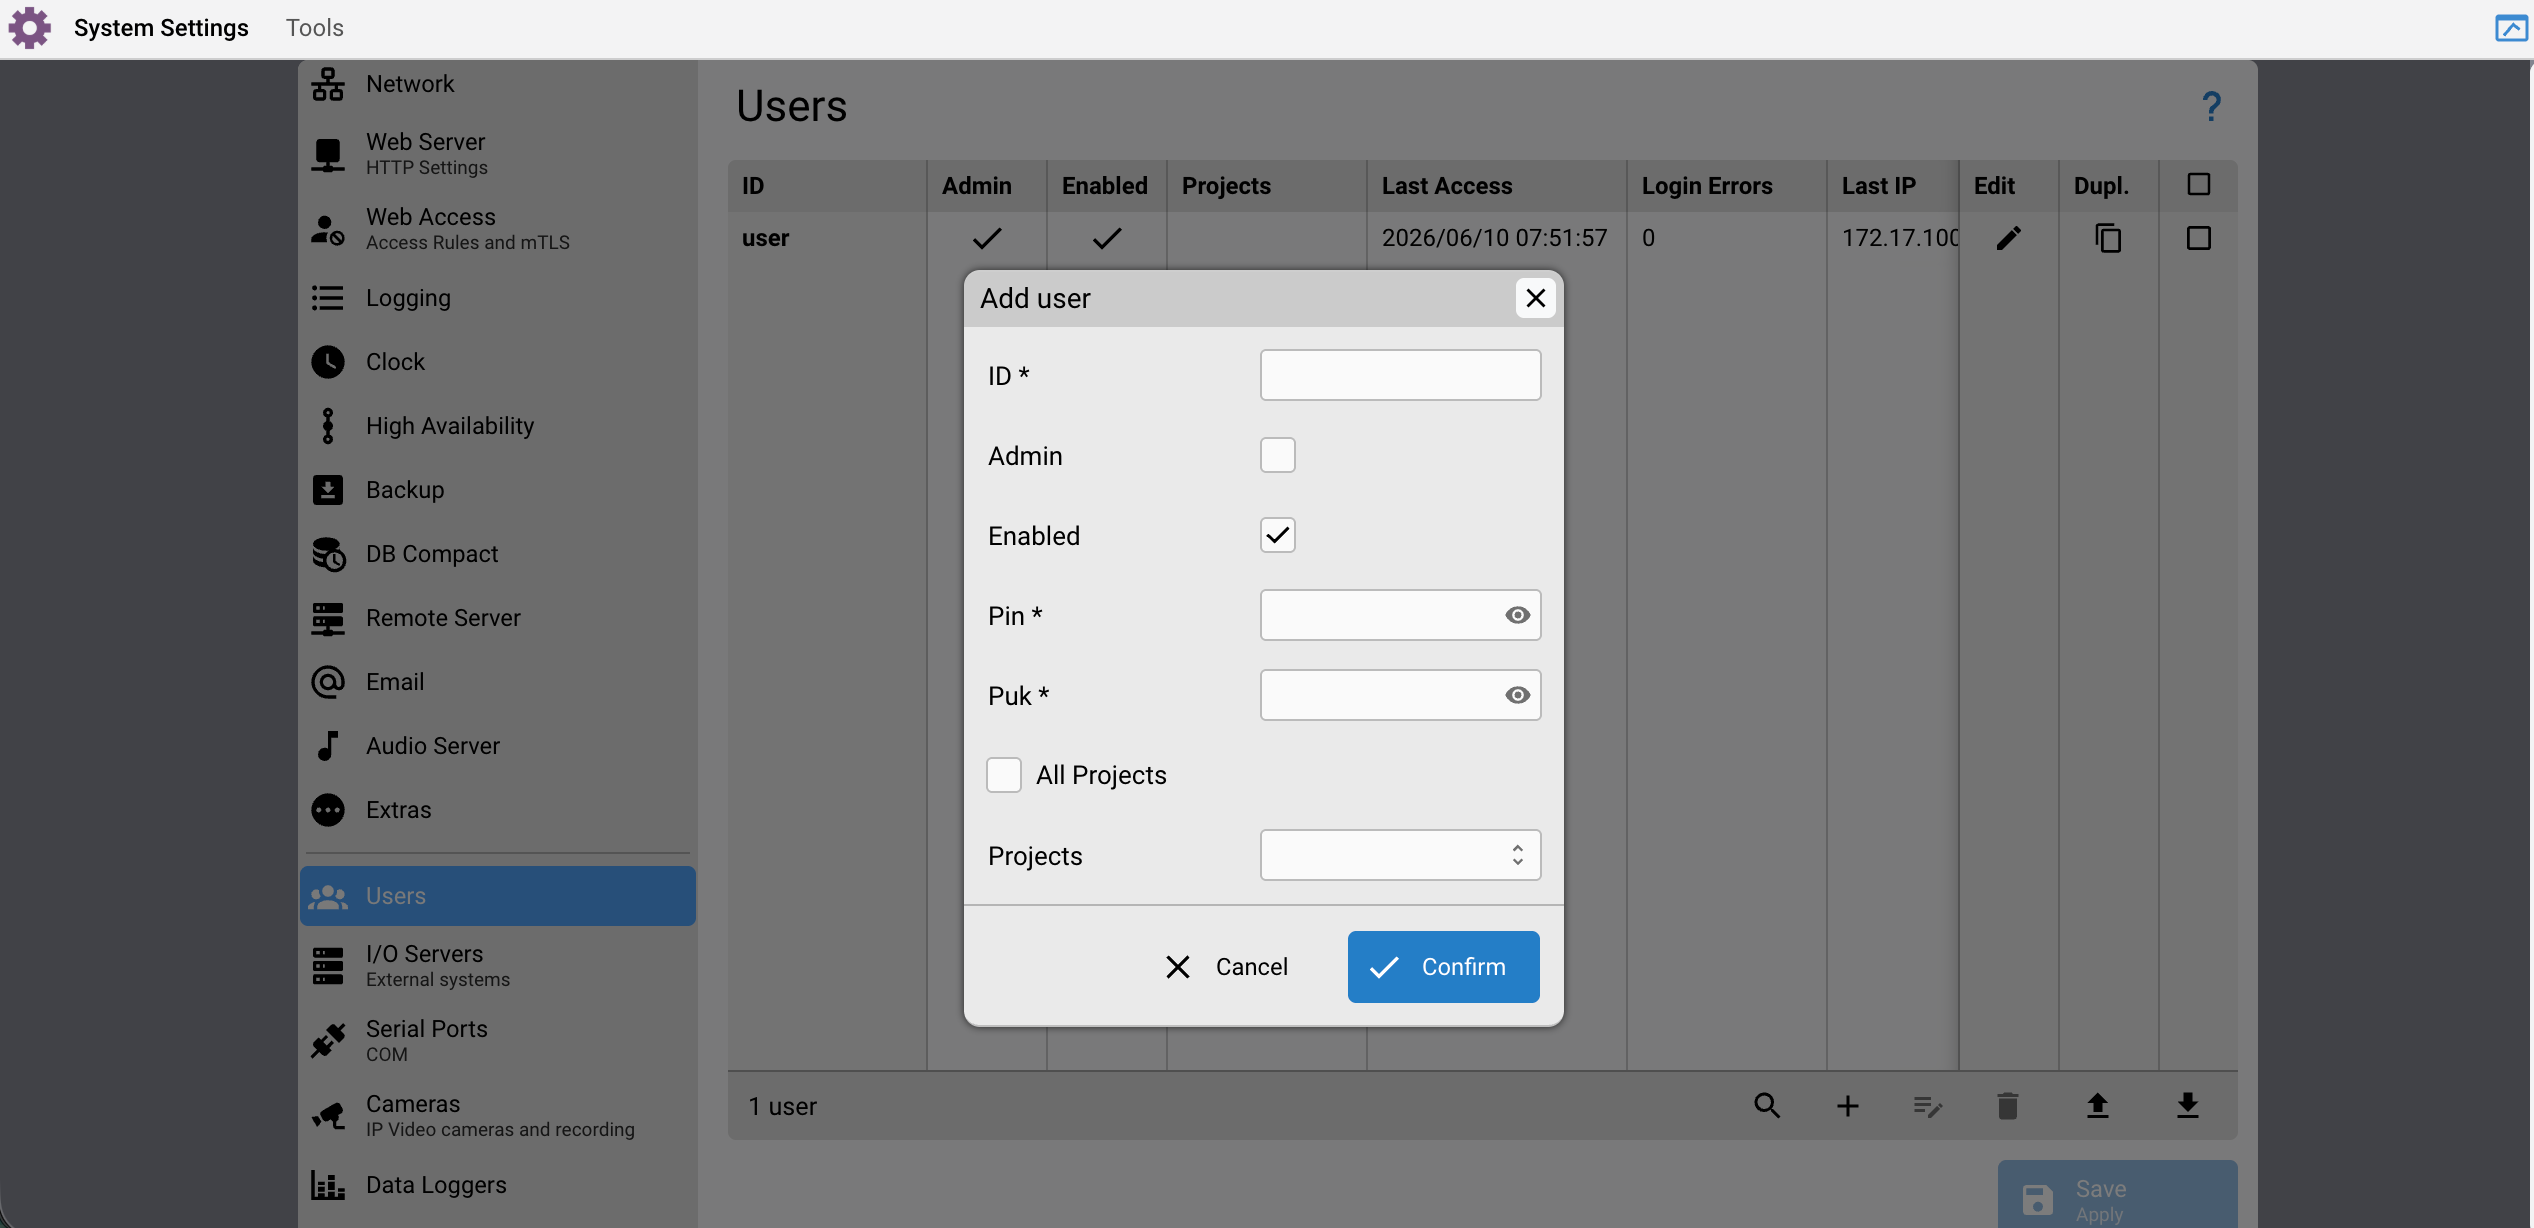
Settings → Users: the user creation form
- Access: Tick the checkbox to allow access to all existing projects, or alternatively select specific projects individually from the Projects list.
After filling in all fields, press Confirm to add the new user. You should now see two users in the users list: the default user and your newly created administrator. Press the Save button in the lower right corner to create the new user. A popup will appear asking for confirmation.
Logging In with the New User
Log out from the Manager splash screen, then log back in using the PIN and PUK of the newly created user. If authentication succeeds, the new account is working correctly and you can proceed to delete the default user.
Deleting the Default User
Navigate to Settings → Users, select the default user, and delete it by pressing the trash bin icon. Confirm the deletion, then click the Save button in the lower right corner.
Tip: You can't delete the user you're currently logged in as. Log out, log back in with your new administrator account, and confirm it works before deleting the default user.
Non-administrator users and project access
Not every user needs the Manager. Leave the Administrator box unchecked and the account can log in to user-interface projects but not to the Manager tools. The Access field then scopes what that user sees: tick the checkbox to allow every project, or pick individual projects from the Projects list so each user reaches only their own interface.
The ACL file
User accounts control who can log in and which projects they open. For finer control over individual commands, HSYCO supports an optional access control list in a file named acl.ini in the root directory. Each line is a rule, action; user_id; location; type; command, evaluated top to bottom until one matches; the first match decides whether the command is allowed or denied, and a command that matches nothing is rejected. This lets you, for example, let a user open a page but block them from sending certain io or camera commands even though they are authenticated. Changes to acl.ini take effect immediately.
2.3.2 SSH Password
From the Manager splash screen, select Settings then General. Enter a valid password (8 to 16 letters and digits) in the system password field, then press Save.
As noted in Section 2.2, change this password before connecting the server to any unsecured network.
2.3.3 Network Configuration
Navigate to Settings → Network. The Network settings page displays two tables.
Ethernet and Wi-Fi Interfaces
The upper table lists the Ethernet and Wi-Fi interfaces available on the HSYCO server. The list varies depending on the presence of one or two Ethernet ports and the Wi-Fi adapter. The main Ethernet port is usually listed as eth0, the secondary as eth1, and so on. The Wi-Fi adapter, if present, is listed as wlan0.
To add a new interface, click the + icon. To change the settings of an existing interface, select it then click Edit. To add an additional IP address on the same interface, click the + icon, select an existing interface, then add a new IP address. The additional IP address is listed with the :n suffix.
When multiple interfaces are configured, the first one in the list (highest priority) has the router and DNS enabled. For all other interfaces, the router and DNS are automatically disabled. You can change the priority order by clicking the icon on the right side of the table and dragging the selected row up or down (Figure 8).
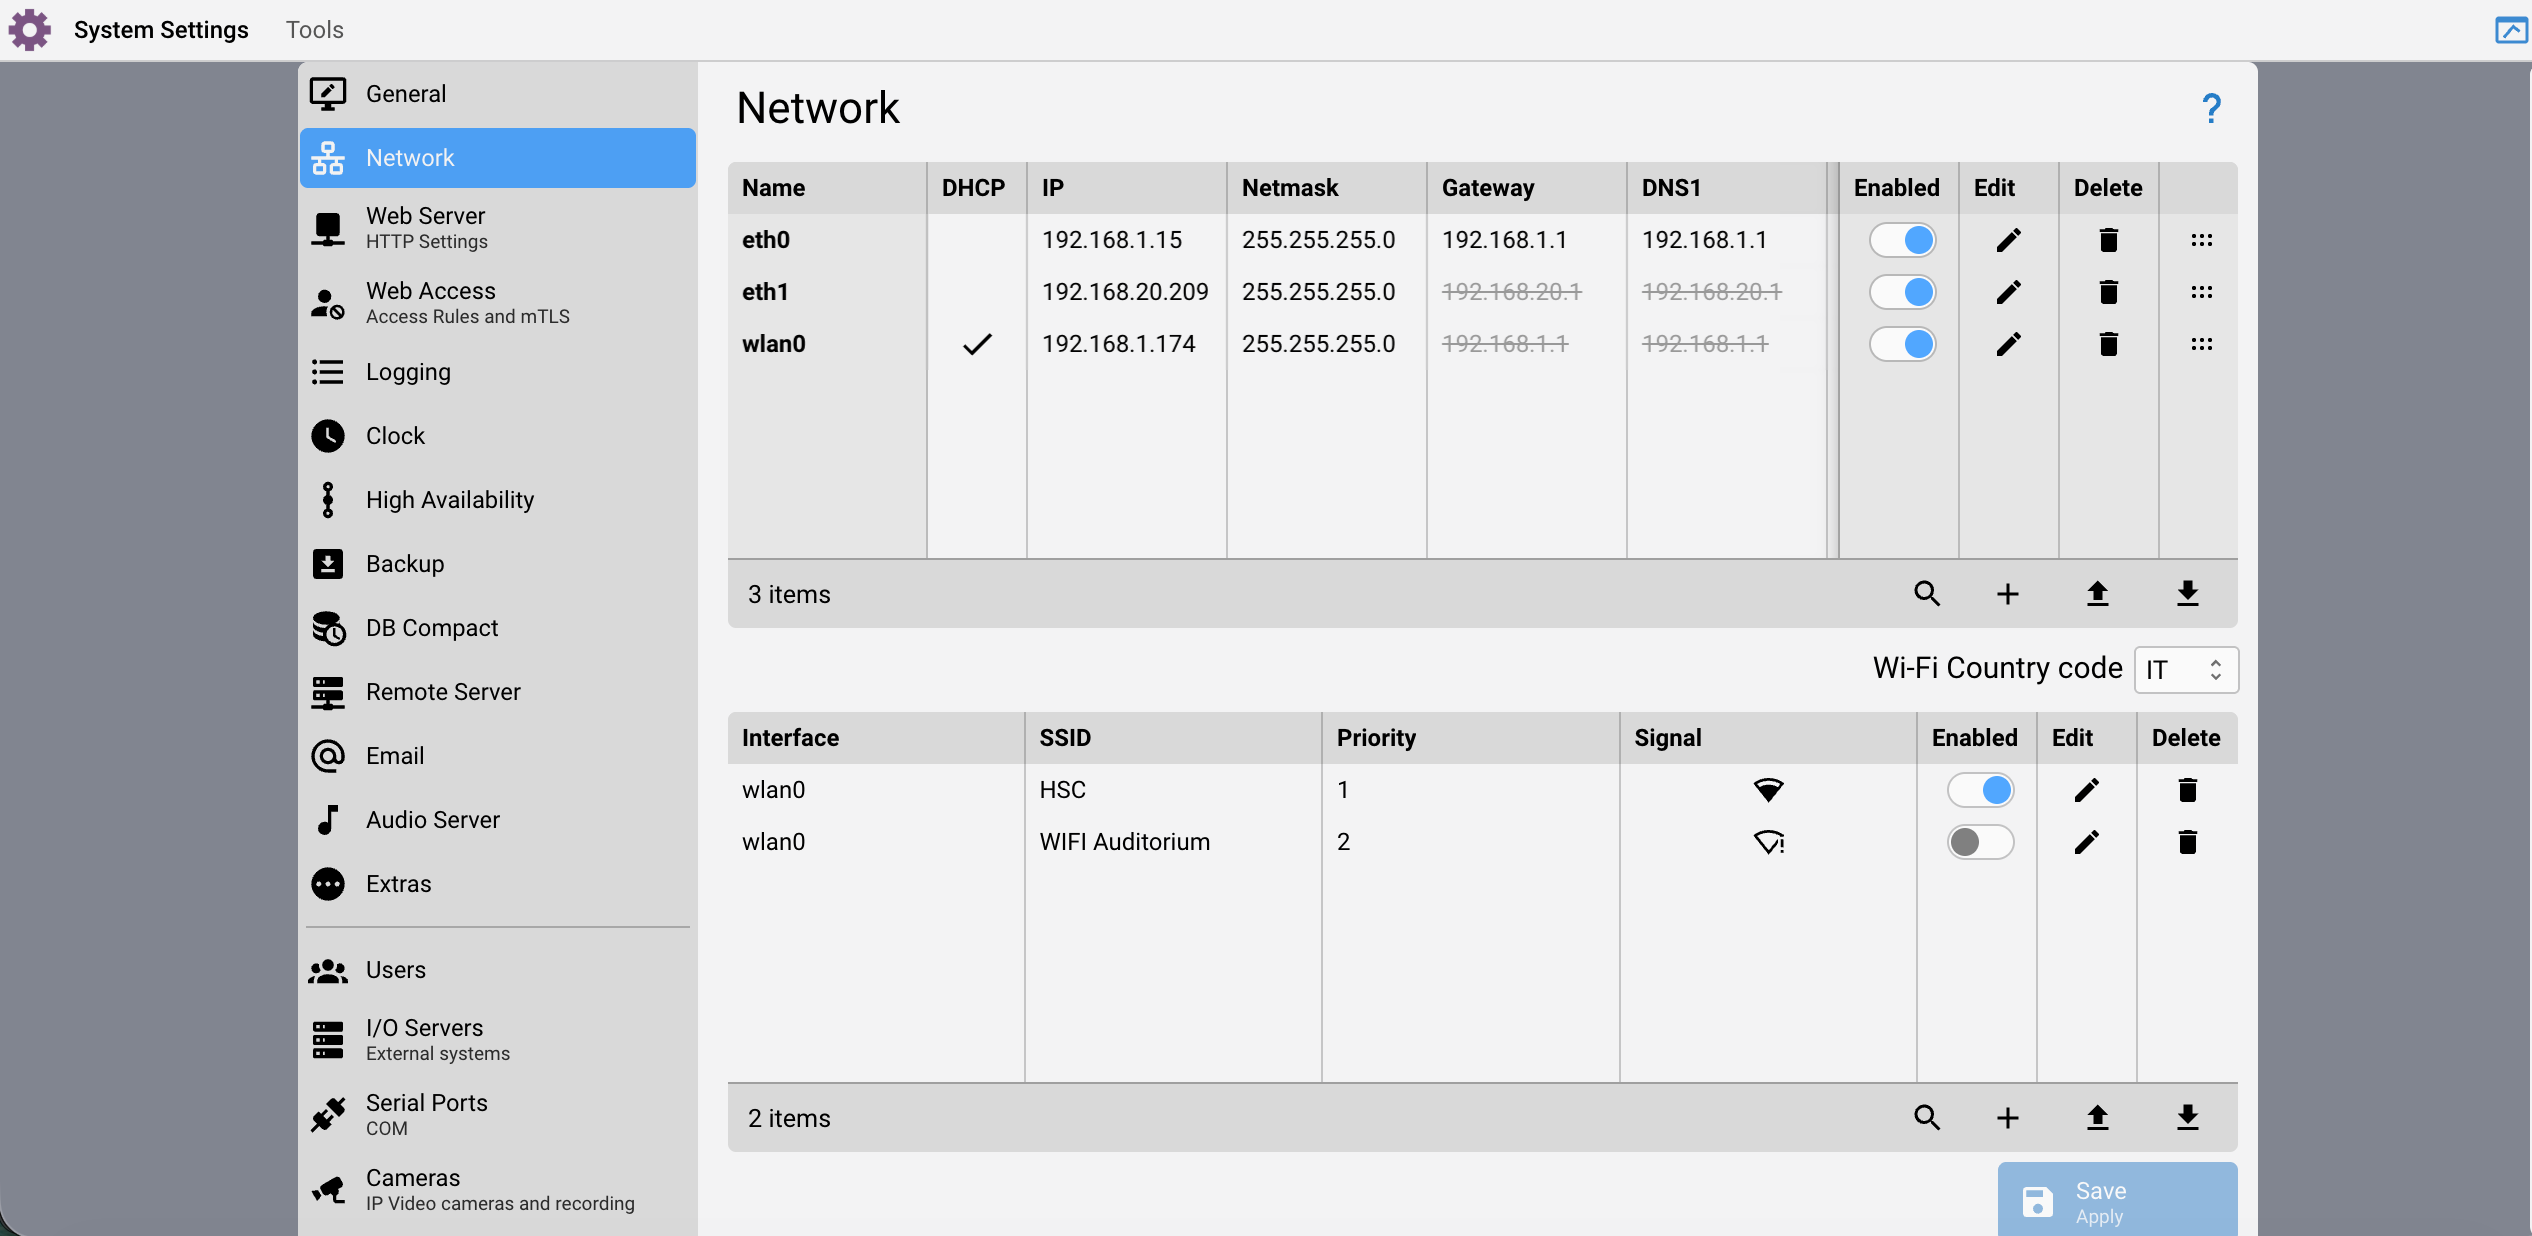
Settings → Network: the Ethernet and Wi-Fi interfaces table
Wi-Fi SSIDs
If your server has a Wi-Fi adapter, the lower table shows configured Wi-Fi SSIDs. Click the + icon to add a new SSID. The priority field determines connection order: HSYCO will first try to connect to the SSID with priority 1 and, in case of connection failure, will proceed to the next ones in order.
Saving Network Changes
Click the Save button in the bottom right corner to confirm new network settings. The same 5-minute rollback safety mechanism described in Section 2.2 applies here: if you don't reconnect within 5 minutes, the system reverts to the previous configuration.
2.3.4 Clock Settings
Navigate to Settings → Clock. By default, time is set automatically by polling Network Time Protocol (NTP) servers. To configure the clock manually, disable Time Auto Update, enter the new parameters, and press Save. All other clock parameters are read-only here and are configured through the Settings menu.
2.4 Understanding the HSYCO File Structure
HSYCO stores everything in plain files; configuration, user interfaces, automation logic, and runtime data. Most files are readable text that you can open with any text editor. This design makes backups straightforward and gives you direct access to your system's configuration when needed.
2.4.1 The HSYCO Installation Directory
You'll find HSYCO installed in /home/hsyco. Inside this directory, the hsyco subdirectory contains everything: the software itself, configuration files, custom programs, logs, and camera recordings.
2.4.2 Core Configuration Files
Several files in the main directory control how HSYCO operates. Some you'll work with through the Manager interface, while others HSYCO manages automatically.
hsyco.jar
This file is HSYCO itself, the complete software package. When updating to a new version, you replace this file with the updated one. After any change to this file, HSYCO automatically restarts within a few seconds.
hsyco.ini
This is where all configuration parameters live. When you configure I/O Servers, adjust network settings, or modify system options through the Manager, you're actually editing this file in the background. The file uses a simple parameter=value format. Like hsyco.jar, any change triggers an automatic restart after a few seconds.
license.txt
HSYCO needs a valid license to operate fully. The first time HSYCO starts, it creates this file with a unique hardware identification code. You send this file to HSYCO Srl, who provides a license file with your unlock key. Replace the generated file with the licensed version, and HSYCO automatically detects the change and unlocks (no restart needed).
Without a valid license, HSYCO runs its web servers so you can access the Manager, but all field device access is disabled, you can view pages but can't control anything.
The hardware code is based on your server's components. If you replace or add network cards, the code changes and your license becomes invalid for the new configuration.
access.ini
User authentication information lives here, including the PIN and PUK codes for everyone who can log in. The Manager’s user management interface normally handles this file, but you can edit it manually if needed. HSYCO also updates it after each login, recording the time, IP address, and any failed login attempts.
The file uses partial encryption, but the PIN and PUK codes could theoretically be retrieved with special decryption methods. For this reason, treat this file as sensitive, don’t copy it through insecure channels or allow authorized access.
catalog.json
This file lists all devices in your system and defines how user interface objects connect to I/O Server datapoints. Many I/O Servers can automatically populate this file through discovery mode. You can also edit it manually; changes are detected and applied automatically without requiring a restart.
The catalog.json file is only required if you are building a user interface. If your HSYCO installation runs only for automation logic with no user interface, you do not need it.
timers.data
This database stores settings for all timers, alarms, irrigation schedules, light timers, and other time-based functions. HSYCO creates and manages this file automatically. Don’t modify or delete it manually.
hsyco.keys
The SSL certificate for HTTPS traffic lives here. When HSYCO starts without finding this file, it automatically generates a new self-generated certificate based on the server name defined in hsyco.ini. Otherwise it uses whatever certificate the file contains, whether self-generated, imported manually, or issued by an official Certification Authority. HSYCO also supports automatic certificate creation and renewal through ZeroSSL; see the SSL Certificates section for details. If you change the ServerName parameter in hsyco.ini, HSYCO recreates this file on the next restart.
keys.data
This database stores secure authentication keys that maintain browser session. HSYCO manages it automatically.
console.log.1 and console.log.2
System-level log files containing messages from the operating system and Java Virtual Machine. HSYCO rotates between the two on every restart: the current console.log.1 becomes console.log.2, and a new console.log.1 is started. This means you always have the current session's log plus a backup from the previous run.
acl.ini
This optional file defines access control lists for web-based commands. It adds a security layer beyond basic authentication, letting you restrict specific users from executing certain commands even when logged in, Changes take effect immediately without restarting HSYCO.
tunnel.ini
Configuration for the Tunnel Utility, which creates secure reverse SSH tunnels to a remote server. This file exists by default, with tunneling disabled (enable = false), whether or not you've configured a tunnel.
2.4.3 Directory Structure
HSYCO organizes files into logical directories, each serving a specific purpose.
hsyco/com/hsyco
Custom Java files go here. The file user.class must always exist, even if you haven't customized it. The source file user.java isn't required for HSYCO to run.
hsyco/www
All customizable files for web pages live in this directory. Standard files come packaged in hsyco.jar, so they don't need to exist here. When you add custom files in the appropriate locations under www, they take priority over the standard versions.
Whenever HSYCO detects changes to files in www or its subdirectories, it automatically forces connected browsers to refresh, so changes appear immediately.
hsyco/www/projects/<project>/index.xml
Each project directory contains an index.xml file defining the complete user interface. You can't use reserved names like "img" or skin names for project directories. Each directory can contain only one interface definition file.
hsyco/www/img
Image files for all HSYCO interfaces go here. Files in a project's img subdirectory (projects/<project>/img) take priority over files in this main directory.
hsyco/data
The embedded SQL database (HSQLDB) stores its files here. The database is called hsyco and contains persistent variables, data logger information, and other data that survives restarts.
hsyco/logs
Daily log files are organized in subdirectories by year. HSYCO generates a new log file each day. The amount of information logged depends on log level settings in hsyco.ini. Logs capture field events, commands sent, user access, and errors.
If you've integrated anti-intrusion systems, you'll also find security.log files here containing activation, deactivation, and alarm events.
hsyco/motion
Camera recordings go here. Each camera gets its own subdirectory named with its camera ID from hsyco.ini. Within each camera directory, files are organized in two more subdirectory levels. HSYCO manages these directories and files automatically. Camera configuration and recording are covered in Chapter 13.
Don't delete files manually from these directories, it can cause playback and recording problems. If you need to clear recordings for a camera, delete all its files, then restart HSYCO so it can rebuild the image index correctly.
HSYCO automatically deletes old recordings based on the storage time configured in hsyco.ini for each camera. It also removes older frames before they expire if disk space gets low.
hsyco/drivers
Custom I/O Servers written in Java go here. Each driver gets its own subdirectory. This lets you interface with systems not included in HSYCO's built-in library.
hsyco/plugins
Plugins bundle user interface design and application code in distributable packages. Each plugin has its own subdirectory here.
hsyco/Scripts
This directory might not exist or might be empty. It contains operating system scripts for automatically starting HSYCO when the server boots. You can also store custom scripts here that your user.java code calls.
2.4.4 Accessing Files Through SSH
For direct file system access, SSH provides both console and file management capabilities. Several programs work well:
-
Windows: PuTTY for console access, WinSCP for file management through SFTP
-
macOS: Built-in Terminal for SSH, Cyberduck for file management
-
Linux: Built-in ssh and sftp commands, or GUI tools like FileZilla
If you're behind a firewall, you may need to open TCP port 22 and configure forwarding to your HSYCO server's IP address.
2.5 Creating Backups
HSYCO provides backup and restore capabilities through the Manager. You can create backups manually whenever needed.
2.5.1 Accessing the Backup Tool
From the Manager splash screen, select Backup/Restore/Update. You'll see three sections: Backup, Restore, and Update. Select Backup to create a new backup.
2.5.2 Recipe: Creating a Manual Backup
HSYCO provides backup capabilities through the Manager interface. Manual backups create a ZIP file containing selected components from your HSYCO installation (Figure 9).
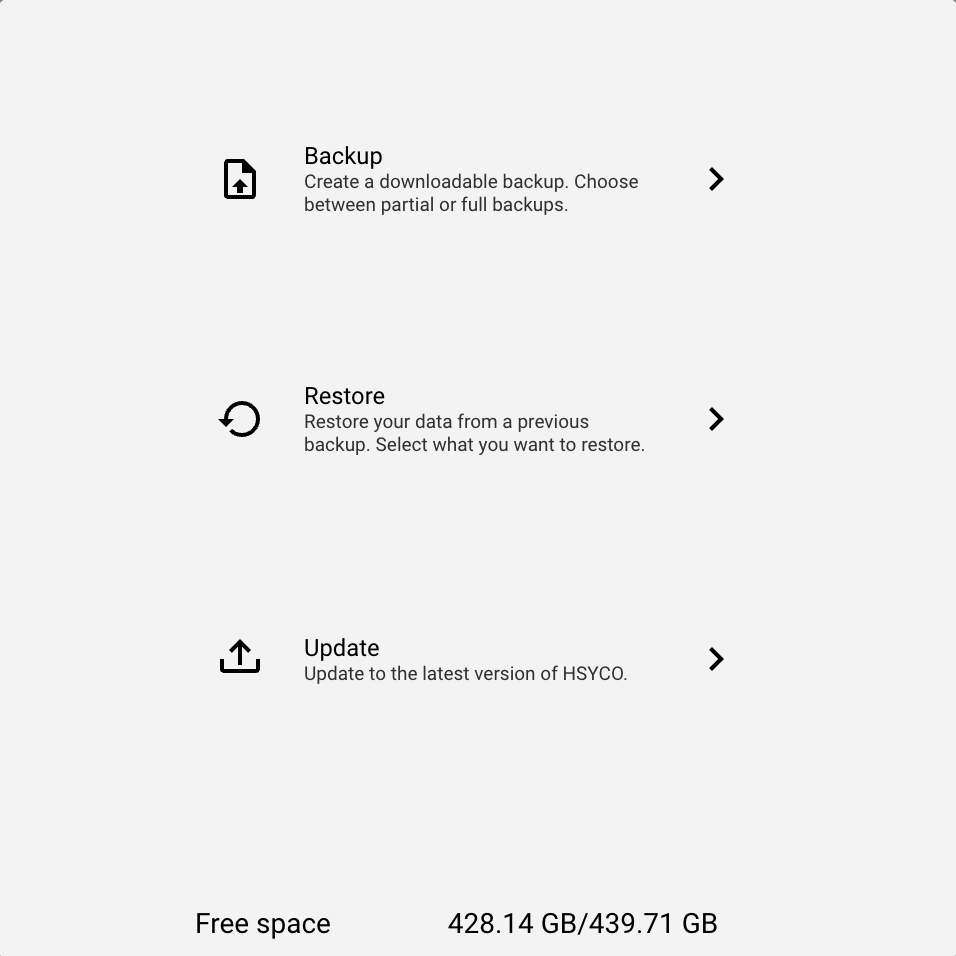
The Backup section of the Backup/Restore/Update application
Steps:
-
From the Manager splash screen, select Backup/Restore/Update.
-
Navigate to the Backup section.
-
Choose the components you want to include in the backup.
-
Click Next.
-
Wait for the process to complete, HSYCO notifies you when the backup is successfully created.
-
Click Download to save the ZIP file to your computer.
HSYCO creates a single ZIP file containing the components you selected. The Download button saves it to your computer.
2.5.3 Recipe: Restoring from a Backup
Restoring writes the contents of a backup ZIP back onto the server. Use it to roll a configuration back to a known-good state, or to move a configuration onto replacement hardware. The Restore tool runs as a short wizard with four steps: upload, choose (Figure 10), restore, done.
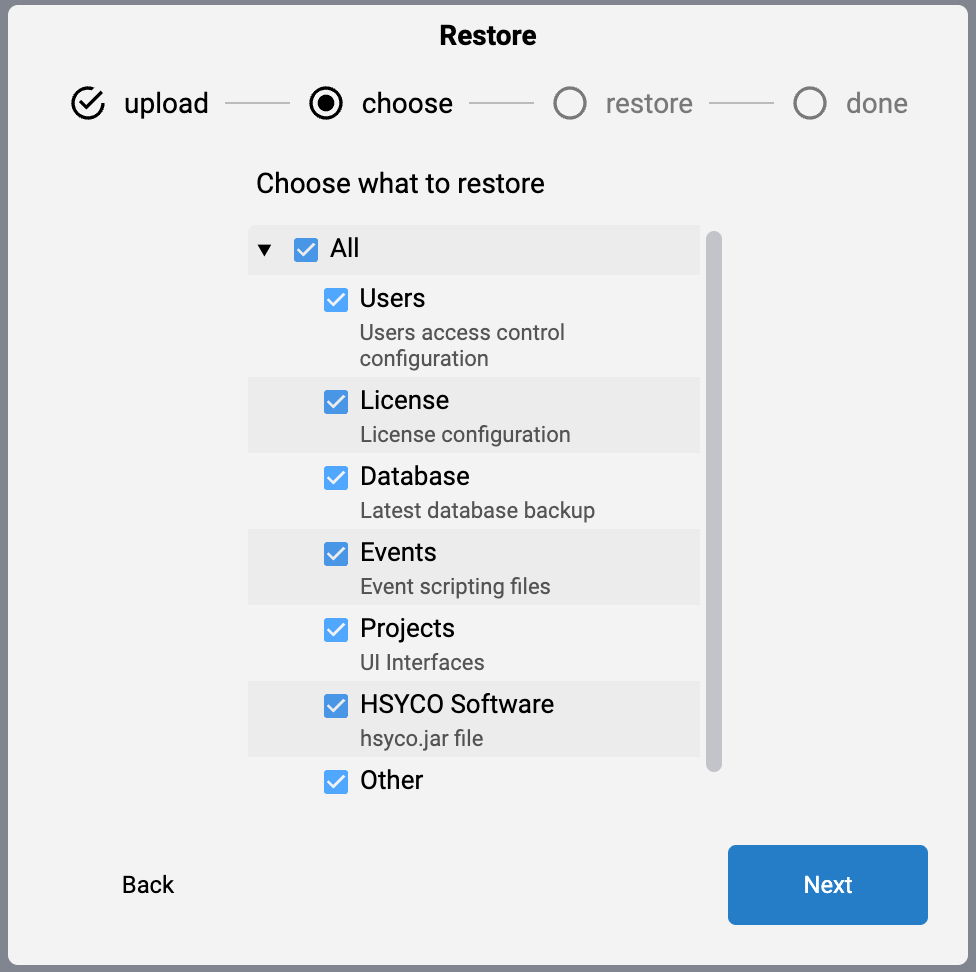
The Restore wizard's "choose what to restore" step
Steps:
-
From the Manager splash screen, select Backup/Restore/Update, then open the Restore section.
-
upload: select the backup ZIP file, or drag it onto the panel, then click Next.
-
choose: in the "Choose what to restore" tree, tick the components you want. All selects everything; otherwise pick individually from Users (access-control configuration), License, Database (the latest database backup), Events (event scripting files), Projects (UI interfaces), HSYCO Software (the
hsyco.jarfile), and Other. Click Next. -
restore: review your selection and start the restore.
-
done: wait for HSYCO to report that the restore has finished, then verify the restored configuration behaves as expected.
Only the components you tick are overwritten with the contents of the backup; the rest are left unchanged.
Whether HSYCO restarts depends on what you restored. Restoring components that HSYCO reloads automatically, such as Projects, takes effect without a restart. Restoring HSYCO Software or configuration files such as hsyco.ini triggers an automatic restart a few seconds later, exactly as replacing those files directly would (see Section 2.4.2).
2.6 Configuration Console for Recovery
If you make errors during network configuration that prevent web access to the server, HSYCO provides a low-level maintenance console for recovery. This console is not used during normal operations; it exists specifically for situations where web access is unavailable.
The console is available by connecting a keyboard and monitor to the server's VGA, DVI, or HDMI video connector. However, you can also operate it without a monitor at all, using a keyboard and audio feedback only. When you type a function number and press Enter, the system sounds a number of beeps corresponding to that function number. Listen to the beeps to confirm which function you've selected, then press Y to confirm.
This blind-operation mode is particularly useful on Strato Pi Max based servers (PRO, ENTERPRISE, and CORE), which are compact units that may be installed in enclosures or locations where connecting a monitor is impractical. As long as you can connect a USB keyboard and hear the server's beeps, you can execute any console function without a display.
-
Function 1 performs an operating system shutdown followed by a reboot.
-
Function 2 performs a shutdown and halts the system completely, you'll need to turn it off and back on to restart.
-
Functions 3 and 4 stop and restart the HSYCO server process without rebooting the underlying operating system.
-
Function 5 restores the factory default network configuration. If you misconfigure network settings and lose connectivity, this function returns the server to
192.168.1.50, allowing you to regain access. -
Function 6 removes all users' PIN and PUK codes, restoring the default
00000administrator PIN, and resets the operating system password to its default value. -
Function 7 deletes all data in the HSYCO database, including persistent variables.
-
Function 8 performs a full factory reset, returning the system to the HSYCO version and settings as shipped, removing all custom data, configuration, and programs.
The recovery console's menu lists all eight functions (Figure 11).
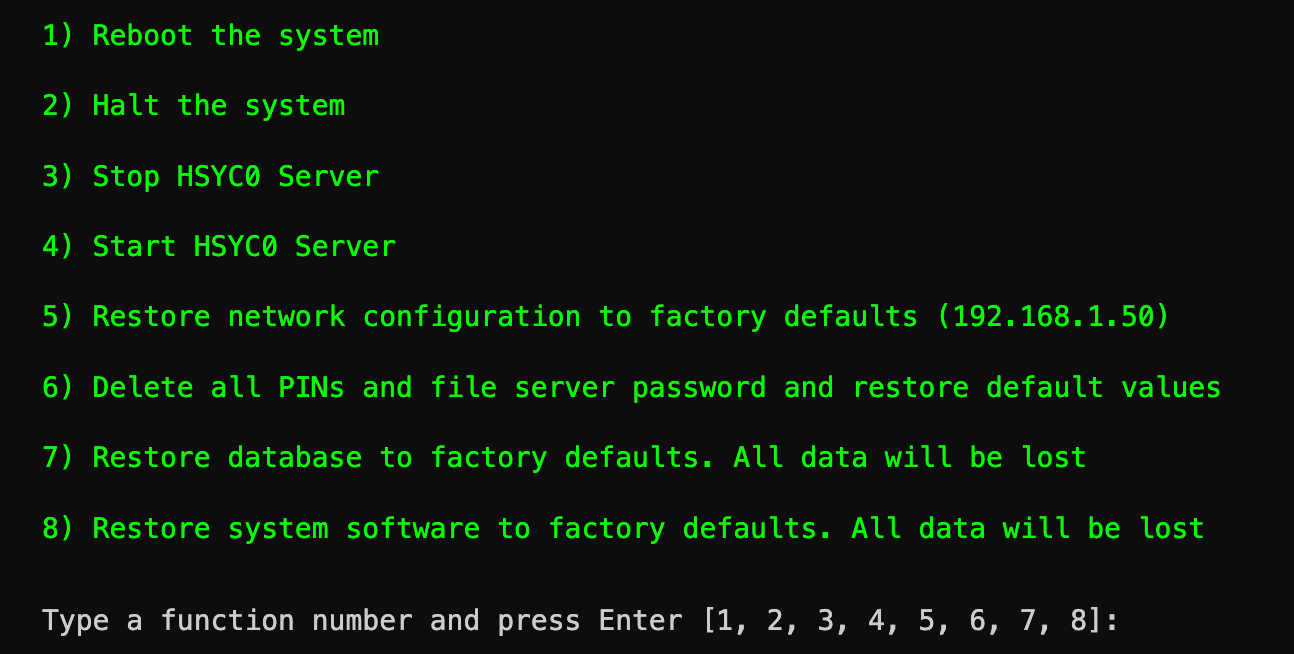
The Configuration Console recovery menu
Caution: Use functions 5 through 8 with care. These functions delete configuration settings, user data, and security settings, and could allow a person with physical access to the server unrestricted access to your data.
Note: Functions 5 and 8 revert the IP address to 192.168.1.50 in most cases, or 192.168.0.50 on older HSYCO servers. If you can't reconnect immediately after using either function, try both addresses.